Como Fazer Anotações Eficazes em Cursos da Udemy | HoverNotes
General7 de janeiro de 2026
Como Fazer Anotações Eficazes em Cursos da Udemy
Transforme seus cursos online com um sistema mais inteligente para anotações da Udemy. Aprenda a capturar detalhes visuais, manter-se organizado e realmente reter o que você assiste.
Por HoverNotes Team•15 min de leitura
Você já passou por isso. Você maratona um curso da Udemy, sente aquela onda de realização e, uma semana depois, tudo fica meio nebuloso. O problema não é o curso; é a lacuna entre assistir e lembrar.
Anotações eficazes da Udemy preenchem essa lacuna. Elas transformam a visualização passiva em uma base de conhecimento permanente e pesquisável que é sua.
#Por que Suas Anotações Atuais da Udemy Não Estão Sendo Retidas
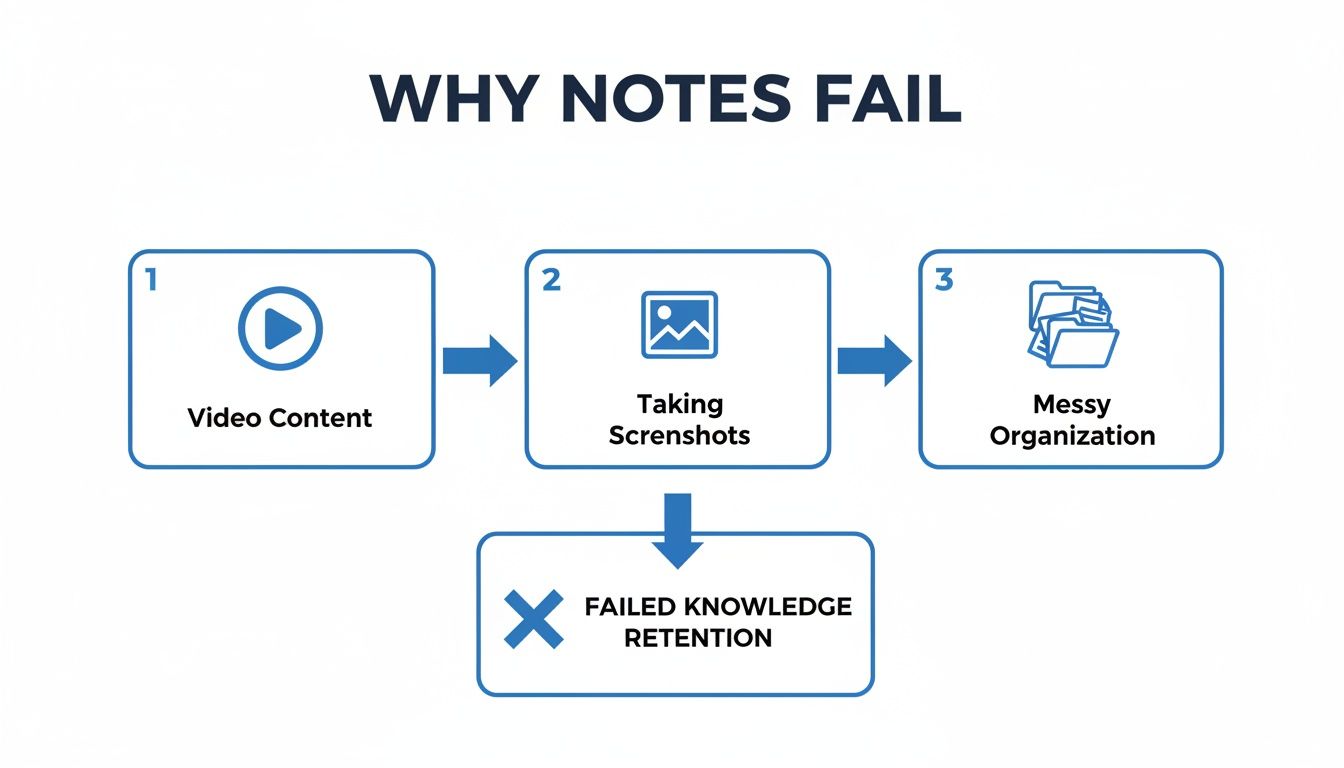
Concluir um curso é uma coisa; tornar esse conhecimento parte de suas habilidades é outra. Se o seu sistema é uma pasta aleatória de capturas de tela e um arquivo de texto meio escrito, você está criando desordem digital, não construindo conhecimento.
O aprendizado por vídeo tem um problema de retenção. As pessoas assistem, mas não se lembram. Isso geralmente ocorre devido a algumas armadilhas comuns.
Pausar constantemente o vídeo, alternar para um editor de texto, digitar e voltar é um malabarismo, não um processo de aprendizado. Fazer anotações manualmente enquanto assiste a um vídeo é difícil.
Toda vez que você muda de contexto, sua concentração é quebrada. Você не está mais pensando no conceito; está apenas tentando acompanhar. É assim que uma lição de 30 minutos se transforma em uma tarefa de 60 minutos, tornando mais provável que você simplesmente desista das anotações.
Confiar na transcrição de um curso parece um atalho inteligente, mas é um desastre para qualquer coisa visual. O contexto visual importa. As transcrições perdem informações cruciais como:
Código na tela: A transcrição pode dizer: "Agora vamos refatorar esta função", mas não mostrará o código real. Você perde a sintaxe e a depuração ao vivo.
Diagramas e gráficos: Uma explicação brilhante da arquitetura de um sistema em um quadro branco é reduzida a uma parede de texto sem sentido.
Demonstrações de software: Ver como um especialista navega em uma interface complexa é o ponto principal. Uma transcrição não pode mostrar isso.
Confiar em transcrições é como ler uma partitura sem nunca ter ouvido a música. Você entende a estrutura, mas perde a experiência.
Capturas de tela parecem produtivas, mas muitas vezes acabam como uma gaveta de lixo digital. Sua área de trabalho fica cheia de arquivos chamados Screenshot_2024-05-16.png, completamente desconectados de suas anotações.
Semanas depois, você olha para uma delas e pensa: "Por que eu salvei isso?" O objetivo real é construir um sistema onde capturas de tela, marcações de tempo e pensamentos escritos convivam. Esta é uma parte central das melhores práticas para o aprendizado online e impede que você seja um espectador passivo.
#Uma Estrutura Mais Inteligente para Capturar Conteúdo da Udemy
Se você acabou com a área de trabalho cheia de capturas de tela aleatórias após um curso da Udemy, vamos consertar isso. Construir um sistema confiável significa passar da transcrição passiva para a captura ativa de conhecimento que você pode consultar por anos.
Comece antes de apertar o play. Prepare seu espaço digital. Feche as abas extras do navegador e dedique uma pasta específica no seu computador ou um novo banco de dados no Notion para o curso. Este pequeno ritual sinaliza para o seu cérebro que é hora de aprender.
Cada método de anotação tem suas vantagens e desvantagens entre conveniência, retenção e organização.
Método
Prós
Contras
Ideal para
Caneta e Papel
Ótimo para retenção de memória (conexão motora).
Lento; não pesquisável; difícil incluir capturas de tela/código.
Aprendizado conceitual onde diagramas e mapas mentais são fundamentais.
Anotações Embutidas da Udemy
Conveniente; marcações de tempo são automáticas.
Anotações ficam presas na plataforma; formatação limitada.
Lembretes rápidos e descartáveis enquanto assiste a uma aula.
Anotações Digitais Manuais
Flexível (Word, Notion, etc.); você é dono do conteúdo.
Alto atrito—pausas constantes, digitação e captura de tela.
Alunos disciplinados que já possuem um sistema robusto de PKM.
Captura Assistida por IA
Baixo atrito; captura marcações de tempo, capturas de tela e anotações de IA.
Requer uma extensão de navegador; depende de uma ferramenta externa.
Alunos eficientes que querem focar no conteúdo, не no processo.
Embora uma abordagem manual lhe dê controle, a constante troca de contexto é muitas vezes o que faz as pessoas desistirem. Uma ferramenta automatizada pode preencher essa lacuna.
Consistência é fundamental. Antes de começar, crie um modelo simples no Obsidian, Notion ou em um arquivo Markdown simples. Isso economiza tempo e torna as anotações pesquisáveis.
Seu modelo pode incluir seções como:
Conceitos Chave: Uma lista com marcadores para as ideias principais.
Trechos de Código/Diagramas: Um espaço para incorporar capturas de tela.
Insights Pessoais: Perguntas, conexões e momentos "aha!".
Itens de Ação: Coisas que você precisa praticar ou pesquisar.
Essa estrutura força você a se envolver com a informação, não apenas a copiá-la. Se você está procurando inspiração, explore diferentes métodos de anotação para ver o que funciona para você.
Um bom modelo transforma um fluxo de informações em um banco de dados de conhecimento, que é fundamental para construir um segundo cérebro eficaz.
O maior obstáculo é o tédio de pausar, digitar e tirar capturas de tela. Isso quebra seu fluxo. É aqui que a IA pode cuidar das anotações para que você possa se concentrar em entender.
Uma ferramenta como o HoverNotes é uma extensão do Chrome que assiste a vídeos com você, gera anotações de IA e as salva como Markdown diretamente no seu sistema de arquivos. Funciona em qualquer site com vídeo, capturando screenshots com marcação de tempo e incorporando-os em suas anotações.
Isso resolve o problema visualizado abaixo — a abordagem desorganizada que leva à falha na retenção.
Sem um sistema, você perde o contexto. Para usuários do Obsidian, isso é particularmente útil porque os arquivos .md e as imagens são salvos diretamente no seu cofre — suas anotações pertencem a você. Essa estrutura não se trata apenas de fazer anotações melhores; trata-se de construir um motor de conhecimento confiável. Você pode aprender mais sobre essa filosofia em nosso guia sobre como construir um segundo cérebro.
Para qualquer curso técnico da Udemy — programação, design, análise de dados — uma transcrição apenas de texto não funciona. O valor está no que está na tela. Se você não consegue ver o código, o diagrama ou a configuração da interface, as anotações são quase inúteis.
Você não pode aprender Python lendo a transcrição de alguém falando sobre código. Você precisa ver a sintaxe. É aqui que a maioria dos fluxos de trabalho de anotações falha. Pausar constantemente, tirar uma captura de tela, salvá-la e vinculá-la de volta às suas anotações acaba com o seu ritmo.
#O Poder das Capturas de Tela com Marcação de Tempo
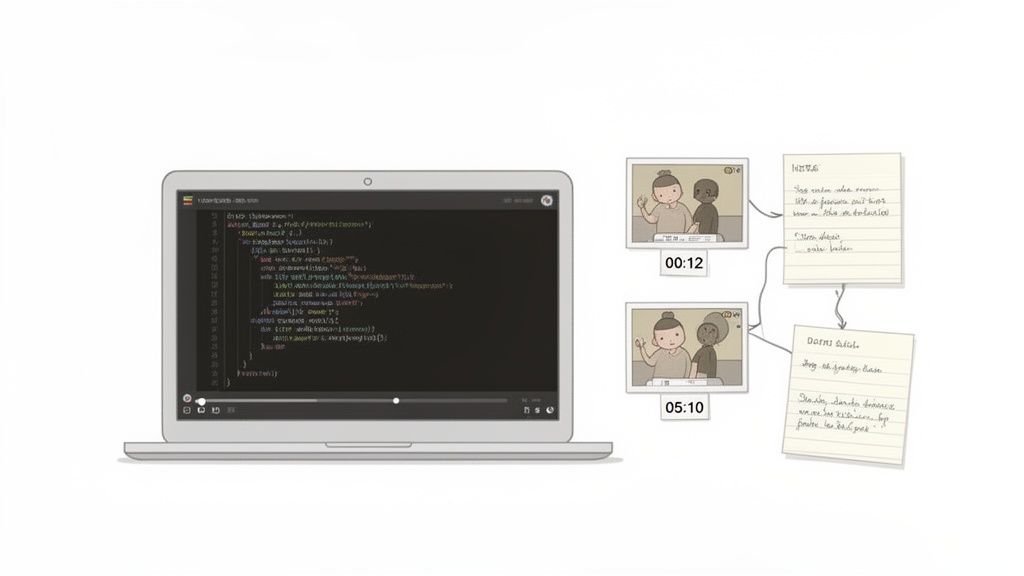
A ferramenta mais eficaz para isso é a captura de tela com marcação de tempo. É um link direto e clicável de suas anotações de volta para o momento exato no vídeo.
Imagine revisar suas anotações daqui a um mês. Você vê um gráfico complexo, mas não consegue se lembrar da explicação. Com uma captura de tela com marcação de tempo, você apenas clica na imagem, e o vídeo da Udemy pula instantaneamente para aquele ponto. Isso economiza horas procurando em palestras.
Cada captura de tela inclui uma marcação de tempo clicável — um clique o retorna àquele momento exato. Isso transforma imagens estáticas em um guia de estudo interativo.
Diferente de ferramentas que apenas analisam transcrições, o HoverNotes assiste ao vídeo para capturar o que está realmente na tela. Ele incorpora essas capturas de tela clicáveis diretamente em suas anotações enquanto você assiste. Cobrimos essa técnica em nosso guia sobre como capturar tela do YouTube e outros sites.
Você nem sempre precisa capturar o quadro inteiro do vídeo. Muitas vezes, você só precisa de uma parte específica — um bloco de código, uma fórmula ou um gráfico. É aqui que um recurso de captura de recorte é útil.
Em vez de capturar a tela inteira e cortá-la depois, você seleciona apenas a região relevante desde o início. Isso mantém as anotações limpas e focadas.
Para cursos de programação: Recorte apenas a função que está sendo discutida.
Para ciência de dados: Capture apenas a visualização específica.
Para tutoriais de design: Capture o painel de camadas exato ou a configuração da ferramenta.
Esse pequeno ajuste faz uma grande diferença. Suas anotações da Udemy se tornam mais densas com informações de alto valor e livres de desordem. Quando você consegue converter palestras em vídeo em anotações úteis de forma eficiente, suas sessões de estudo se tornam muito mais eficazes.
#Como Organizar Suas Anotações da Udemy no Obsidian e Notion
Capturar ótimas anotações da Udemy é metade da batalha. Se suas anotações acabam em uma gaveta de lixo digital, elas não são um ativo duradouro. Onde você armazena as anotações é tão importante quanto como você as faz.
Para estudantes sérios, duas plataformas se destacam: Obsidian e Notion. Cada uma tem uma filosofia diferente, mas ambas podem transformar anotações espalhadas em um segundo cérebro pesquisável. O truque é escolher um sistema e mantê-lo.
#O Método Obsidian: Seu Cofre de Conhecimento Local
O Obsidian é para pessoas que valorizam a posse de seus dados. Ele é construído sobre arquivos Markdown simples (.md) que ficam no seu computador — sem formatos proprietários, sem serviços em nuvem mantendo suas anotações como reféns. O armazenamento local significa que você é dono do seu conhecimento para sempre.
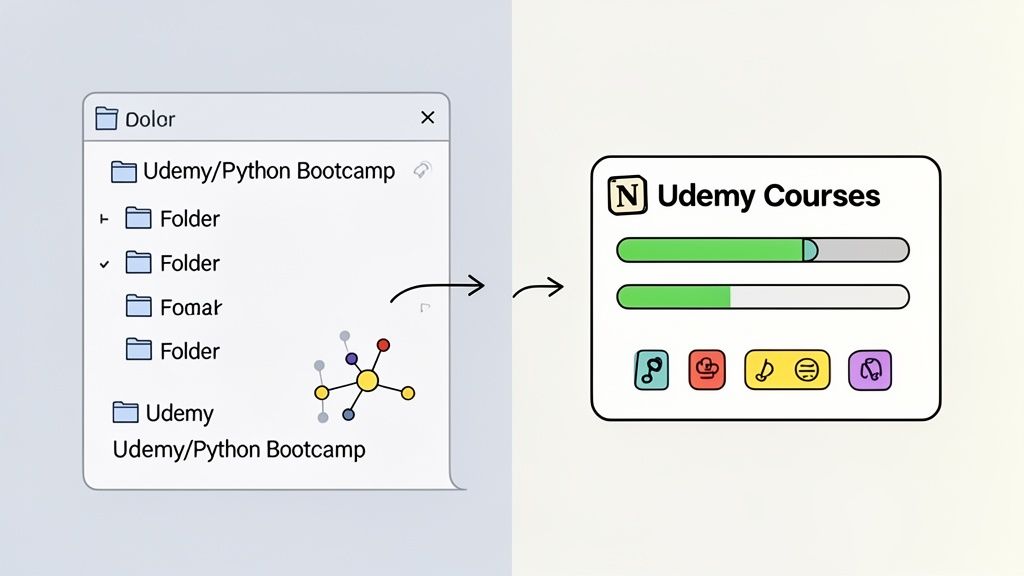
A maneira mais eficaz de gerenciar anotações da Udemy no Obsidian é com uma estrutura de pastas simples. Crie uma pasta principal como 03-Aprendizagem/Udemy/ e adicione uma subpasta para cada curso.
É aqui que uma ferramenta como o HoverNotes faz a diferença. Ele salva suas anotações geradas por IA e capturas de tela com marcação de tempo diretamente no seu sistema de arquivos como arquivos .md. Você pode apontá-lo diretamente para o seu cofre do Obsidian, e cada anotação de um vídeo da Udemy vai para o lugar certo.
Você é o dono dos arquivos. Mova-os, faça backup, use grep — eles são apenas Markdown. Este é o princípio central que torna o Obsidian tão resiliente para o gerenciamento de conhecimento a longo prazo.
Para o público da Udemy de desenvolvedores e profissionais, cada curso é um investimento. Integrar anotações com um sistema como o Obsidian garante que esse investimento valha a pena por anos.
O Notion é sobre criar bancos de dados estruturados e painéis integrados. Para cursos da Udemy, um banco de dados é a ferramenta perfeita.
Crie um novo banco de dados chamado "Cursos da Udemy". Cada entrada é uma página representando um curso. Em seguida, adicione propriedades para acompanhar seu progresso.
Propriedades Essenciais do Banco de Dados do Notion:
Status: Um menu suspenso com opções como Não Iniciado, Em Andamento e Concluído.
Categoria: Uma seleção múltipla para tópicos como Programação, Marketing ou Design.
Instrutor: Um campo de texto simples.
URL: Uma propriedade de URL que leva de volta à página do curso.
Ao fazer anotações, cole-as na página do curso. Como ferramentas como o HoverNotes geram Markdown formatado de forma limpa, suas anotações copiam perfeitamente para o Notion com todos os títulos, marcadores e imagens intactos. Isso transforma cada página de curso em um painel abrangente.
#Transformando Suas Anotações em Conhecimento que Permanece
O objetivo de fazer anotações da Udemy não é construir um arquivo bonito. É lembrar e usar o que você aprendeu. Capturar informações é fácil; transformá-las em conhecimento durável acontece depois que você fecha o vídeo.
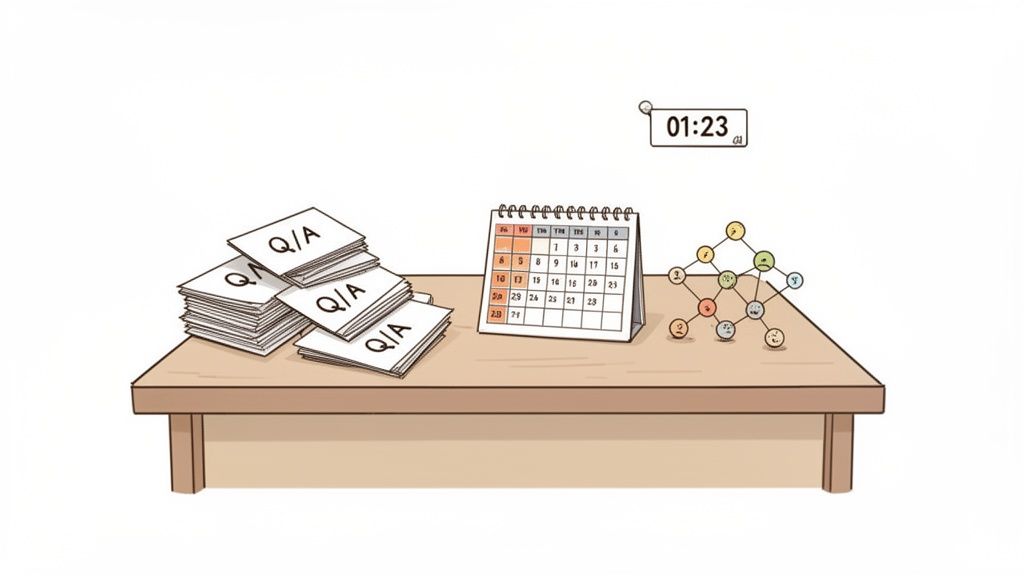
Suas anotações são uma ferramenta dinâmica. A maneira mais eficaz de usá-las é através da recordação ativa — puxar informações do seu cérebro em vez de empurrá-las passivamente.
Em vez de apenas escanear suas anotações, coloque-as para trabalhar. Cubra-as e tente explicar um conceito chave em voz alta.
Explique o "Porquê": Force-se a articular por que uma função funciona da maneira que funciona, não apenas que ela funciona.
Use Pistas Visuais: Dê uma olhada em uma captura de tela de um diagrama, depois desvie o olhar e desenhe-o de memória.
Encontre Seus Pontos Fracos: Os momentos em que você hesita são preciosos. Eles apontam exatamente onde sua compreensão é fraca e o que revisitar.
Essa pequena mudança transforma o estudo de uma tarefa passiva em um exercício mental ativo. A diferença na retenção é enorme. Você pode aprofundar nessas estratégias em nosso guia sobre como fazer um guia de estudo.
#Fazendo Suas Sessões de Estudo Acontecerem de Verdade
O maior assassino da revisão consistente é o atrito. Procurar por uma explicação de 30 segundos em horas de vídeo é tedioso. É aqui que um sistema de anotações inteligente e rico em contexto é inestimável.
O recurso de captura de tela com marcação de tempo em uma ferramenta como o HoverNotes é um divisor de águas. Um único clique em uma imagem leva você àquele momento exato no vídeo. Uma busca que antes levava minutos termina em segundos.
Esse recurso por si só remove o atrito irritante de encontrar o que você precisa, tornando muito mais provável que você faça as revisões rápidas e regulares que fazem o conhecimento fixar.
#Conecte os Pontos: Vincule Novas Ideias às Antigas
O verdadeiro entendimento не se trata de coletar fatos isolados; trata-se de tecer novas informações com o que você já sabe. Ao revisar suas anotações da Udemy, pergunte-se constantemente:
Como este conceito de Python se relaciona com o curso de JavaScript que fiz no ano passado?
Eu já vi este problema de design antes em meus próprios projetos?
Este novo fluxo de trabalho poderia melhorar um processo no meu trabalho?
Ao forjar ativamente essas conexões, você está construindo sabedoria. Suas anotações da Udemy se transformam de uma simples transcrição na matéria-prima para uma compreensão mais profunda que você pode aplicar para resolver problemas do mundo real.
Aqui estão algumas perguntas comuns sobre como fazer as anotações da Udemy fixarem, juntamente com respostas práticas.
#Posso Fazer Anotações de um Curso da Udemy em um Idioma Diferente?
Sim. É aqui que as ferramentas de IA brilham. Você pode assistir a um curso técnico em japonês e ter um conjunto completo de anotações da Udemy estruturadas geradas para você em inglês. Isso quebra as barreiras linguísticas и permite que você aprenda com os melhores instrutores do mundo todo.
#Qual é a Melhor Maneira de Organizar Anotações de Vários Cursos da Udemy?
A consistência é a coisa mais importante.
Se você é um usuário do Obsidian: Crie uma pasta principal como /Cursos da Udemy no seu cofre. Cada novo curso ganha sua própria subpasta, como /Bootcamp Completo de Python.
Para a galera do Notion: Um banco de dados dedicado a "Cursos" é o caminho a seguir. Cada curso se torna uma página onde você coloca todas as suas anotações, resumos e recursos. Use propriedades como "Status" ou "Categoria" para filtrar e ordenar.
#Ferramentas Pagas São Necessárias para Boas Anotações da Udemy?
Não são essenciais, mas tornam o processo muito mais eficiente. A maneira antiga envolve pausas constantes e alt-tabbing. Esse atrito é o motivo pelo qual as pessoas param de fazer anotações.
Muitas ferramentas têm planos gratuitos generosos. Algumas extensões oferecem anotações manuais ilimitadas, capturas de tela com marcação de tempo e um modo de vídeo sem distrações, sem custo algum. Você geralmente paga apenas por recursos automatizados de IA.
#Como Devo Capturar Trechos de Código em Minhas Anotações?
Use um recurso de "captura de região" ou "recorte". É a melhor maneira. Isso permite que você capture uma screenshot apenas do bloco de código, não do player de vídeo inteiro. Isso mantém suas anotações limpas e focadas.
Um recorte visual do código captura seu contexto — formatação, destaque de sintaxe e o ambiente do editor. Ver o código exatamente como o instrutor o apresentou é muito mais valioso para a revisão.
Se você está construindo sua base de conhecimento no Obsidian, o HoverNotes salva anotações e capturas de tela como arquivos Markdown limpos diretamente no seu cofre. Você pode experimentar gratuitamente —20 minutos de créditos de IA estão incluídos, sem necessidade de cartão de crédito.
Pare de esquecer o que você aprende no Coursera. Descubra um fluxo de trabalho prático para criar anotações úteis e pesquisáveis no Coursera que impulsionam a retenção a longo prazo.
Crie um sistema poderoso para anotações de cursos online, desde a captura e organização até a revisão a longo prazo, e nunca mais esqueça o que aprendeu.
Com dificuldades para fazer anotações em MOOCs no Coursera ou edX? Aprenda um fluxo de trabalho comprovado para organizar, reter e aplicar conhecimento de cursos longos sem esgotamento.