何時間もかけてUdemyやCourseraの詳細なコースを受講し、生産的な気分になる。しかし1時間後には、重要なステップをほとんど思い出せない。これは個人的な失敗ではありません。これは、ほとんどのオンライン動画学習におけるデフォルトのモードである「受動的な視聴」の予測可能な結果です。問題はあなたの脳ではなく、あなたの方法にあります。
#オンラインコースで見たことをすべて忘れてしまう理由
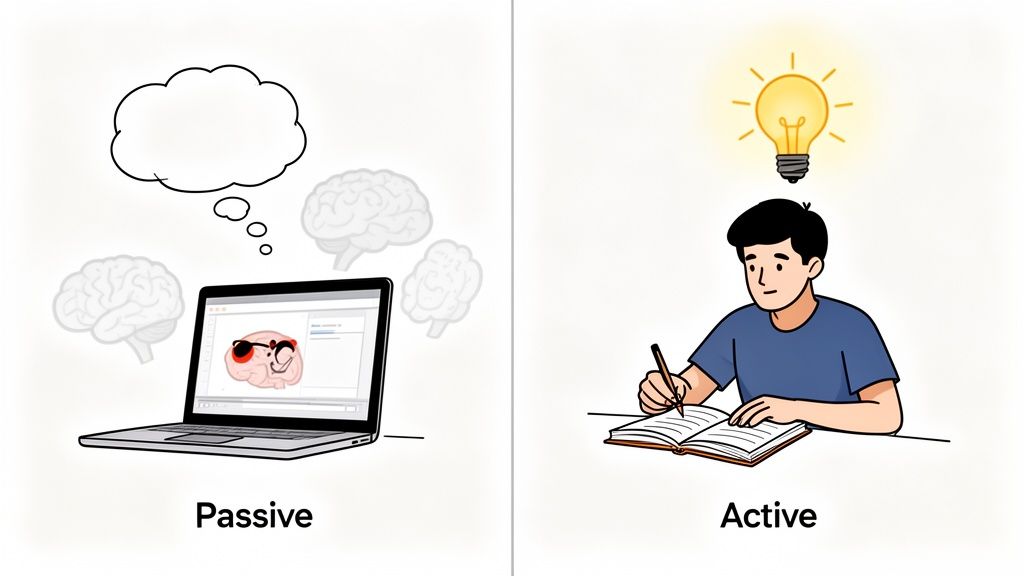
ただビデオを見ているだけだと、脳はエンターテイメントモードに切り替わります。講師が概念を説明するのについていくのは簡単ですが、積極的な関与がなければ、その情報は短期記憶から長期記憶へと移行しません。動画学習には深刻な記憶定着の問題があります。人々は見ますが、覚えていないのです。
これは典型的な「学習の幻想」です。Pythonに関するコースをすべて一気見して、すべてを吸収したように感じても、コードエディタを開くと頭が真っ白になります。概念を認識はできますが、思い出すことはできません。学習が定着しなかったのです。
旧来のノートテイキングの煩わしさ
明らかな解決策はノートを取ることですが、手作業の方法は不便です。常に一時停止と再生を繰り返すのは退屈で、集中力を削ぎます。視聴しながらノートに書くのはぎこちなく、画面から目を離さなければなりません。スクリーンショットを撮ると、文脈から切り離された画像の混沌としたフォルダが残るだけです。
この煩わしさが、学習に必要な行動そのものを妨げます。オンライン学習のベストプラクティスは、このギャップを埋め、積極的な関与をシームレスにするものでなければなりません。
問題の核心は、あなたの脳が受動的な記録装置ではないということです。本当に学ぶためには、教材に積極的に関与し、要約し、疑問を持ち、すでに知っていることと結びつける必要があります。
ここで能動的な学習戦略が登場します。研究によると、情報を積極的に思い出そうとする「検索練習」は、単に受動的に見直す場合と比較して、遅延テストで20~40パーセントポイント高い想起率につながることが示されています。これは、主題を知っていることと、ただ認識していることの違いです。目標は、この積極的な相互作用を手間なく実現するシステムを見つけることです。詳細については、試験で効果的に勉強する方法に関するガイドをご覧ください。
#受動的な視聴者から能動的な学習者へシフトする方法
「能動的な学習者」になる必要があると知っていることと、それを実行することは別のことです。学習習慣をゼロから再構築する必要はありません。脳を関与させるための、小さく意図的な行動を追加することが重要です。
最もシンプルで効果的な方法は10分間サマリーです。ビデオを自動再生させないでください。10分ごとに一時停止し、主要なポイントを1文で要約することを強制します。声に出すか、タイプするかです。この小さな検索行為は、情報を定着させるのに非常に強力です。
もう一つの実践的なヒントは、視聴しながら自分自身と対話を続けることです:
- これは前のモジュールで学んだこととどう繋がるか?
- これの現実世界での例は何か?
- これを初心者にどう説明するか?
これらの質問は、受動的な視聴を精神的なトレーニングに変えます。
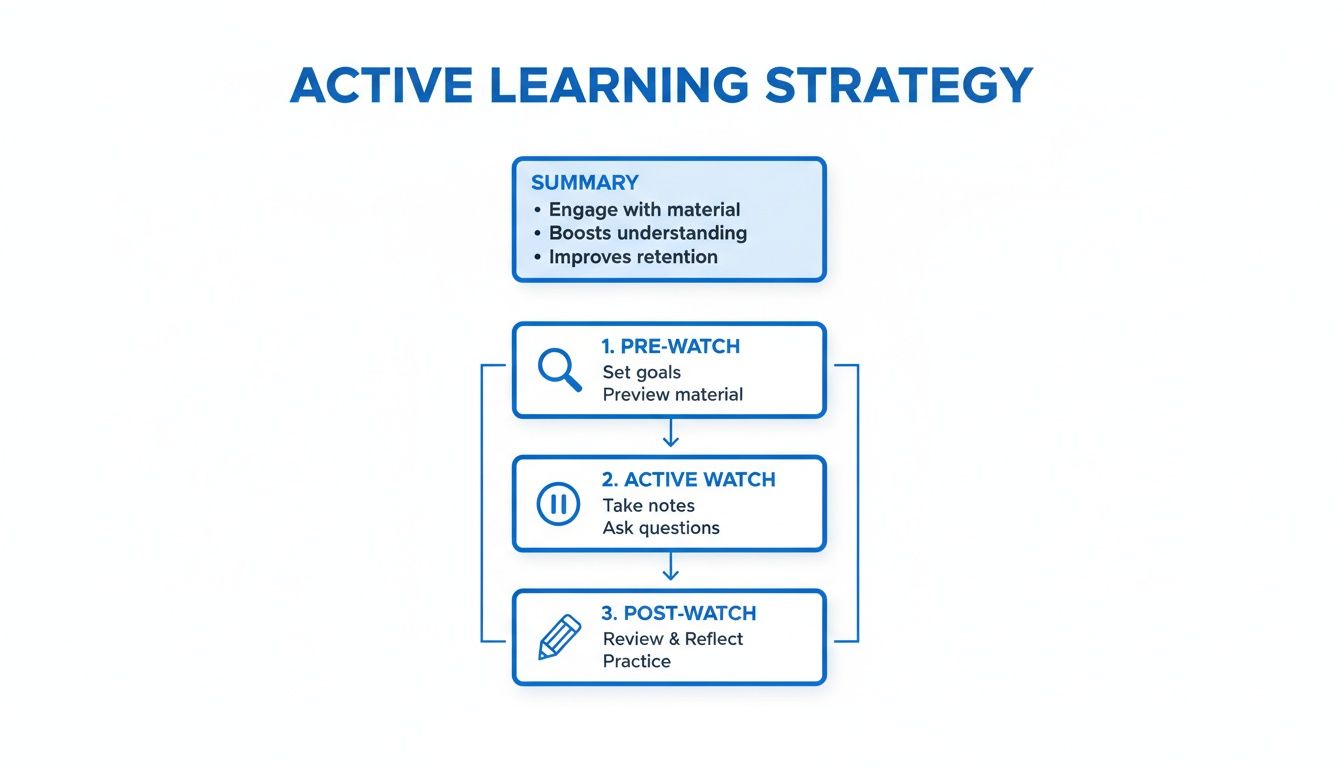
ただ再生ボタンを押すのではなく、すべての学習セッションでこの3部構成のフレームワークを試してみてください。
- 視聴前準備(2分):ビデオが始まる前に、前回のセッションのノートをスキャンするか、コースの概要を確認します。これにより脳が準備され、新しい情報が付着するためのフレームワークが提供されます。
- 能動的視聴フェーズ(コアセッション):10分間サマリールールを使用し、自分自身に質問を続けます。目標は、単なる傍観者ではなく、教材と対話することです。
- 視聴後サマリー(5分):ビデオが終わった瞬間、ノートを見ずに思い出せることすべてを5分間書き留めます。これは、学んだばかりのことを固める純粋な想起演習です。
これらのオンライン学習のベストプラクティスに対する最大の障壁は煩わしさです。ウィンドウを切り替えたり、スクリーンショットを fumble したりするのは面倒です。ここで専用のツールが面倒な作業を取り除き、学習に集中できるようにします。
HoverNotesは、ノートをビデオのすぐ隣に配置するChrome拡張機能で、クリーンで邪魔のないスペースを作り出します。キーボードショートカットで特定の図やコードブロックを取得できます。各スクリーンショットは自動的にタイムスタンプが付けられ、ワンクリックでビデオのその瞬間に戻ることができます。
機械的な煩わしさを取り除くことで、積極的な関与の状態を維持しやすくなります。ツールとの格闘が少なければ少ないほど、学習に使える精神的エネルギーが増えます。
この構造化されたアプローチは時間を増やすのではなく、すでに費やしている時間の価値を倍増させます。より具体的な戦略については、Udemyのビデオから効果的に学ぶ方法に関するガイドをご覧ください。
#なぜビデオのノートにはテキストだけでなく視覚的な文脈が必要なのか
ビデオでコードを学んだことがあるなら、この問題を知っているでしょう。講師が「さて、ここのCSSのパディングを調整します」と言っても、そのセリフの書き起こしは役に立ちません。行番号、構文、開いている他のファイル、そして画面上で更新されるライブプレビューといった本当の情報を逃してしまいます。視覚的な文脈が重要です—書き起こしでは図、コード、デモンストレーションが欠落します。
テキストは何が起こったかを伝えますが、ビジュアルはどのようにそしてどこで起こったかを示します。
このギャップは、ビデオのノートテイキング方法における致命的な欠陥です。テキストだけに頼るのは、部品を説明するだけで図がないIKEAの家具の組み立て説明書で家具を組み立てようとするようなものです。Udemyのデザインコースから大学のポータルでの化学の講義まで、デモンストレーションに依存するどんな主題においても、視覚的な文脈がすべてです。
ビデオの教育的価値の大部分は純粋に視覚的なものです。eLearning Industryの研究によると、書き起こししか得られない学習者は、同期されたビジュアルを持つ学習者と比較して、重要な詳細の最大50%を見逃す可能性があると示唆されています。
これが、マルチモーダルなノートが中核的なベストプラクティスである理由です。あなたのノートはテキストの壁であってはなりません。それらは、あなたの書かれた思考と、それを引き起こした正確な視覚的瞬間を組み合わせた、豊かなリソースである必要があります。
以下のフローチャートは、このためのシンプルなフレームワークを示しており、プロセスを視聴前、視聴中、視聴後に何をするかに分解しています。
このプロセスは、複数の角度から教材に関与することを保証し、記憶の定着を強化します。
最終的に、テキストとタイムスタンプ付きのビジュアルを組み合わせた方法が、最も堅牢で役立つノートを提供します。
では、これらの豊かで視覚的なノートを作成する最善の方法は何でしょうか?手動で一時停止し、スクリーンショットを撮り、それをドキュメントに貼り付けるのは不便です。画像は散らばり、キャプチャしようとしたビデオの時点から切り離されてしまいます。
ここで学習用に作られたツールが違いを生みます。HoverNotesは、ビデオのフレームを一つ一つ監視するChrome拡張機能です。書き起こしを解析するだけのツールとは異なり、実際に画面に表示されているものをキャプチャします。必要なコードスニペットや図だけを切り取って、ノートに直接埋め込むことができます。
すべてのスクリーンショットにはクリック可能なタイムスタンプが含まれており、ワンクリックでビデオのその瞬間に戻ることができます。
これにより、あなたのノートは静的な要約からインタラクティブな学習ガイドへと変わります。ビデオからテキストを取得することについてさらに深く知りたい方は、YouTubeビデオから書き起こしを取得する方法に関するガイドが関連戦略を提供しています。
#あらゆるプラットフォームで円滑なノートテイキングワークフローを構築する
最高の学習意図も、不器用なワークフローによって潰えてしまいます。もしあなたのシステムがビデオプレーヤー、別のノートアプリ、そしてスクリーンショットのフォルダを juggling することを含んでいるなら、あなたは学習よりもロジスティクスに多くのエネルギーを費やしています。目標は、Courseraの講義でもYouTubeのチュートリアルでも、社内トレーニングビデオでも同様にスムーズに機能するセットアップを構築することです。
本当に効果的なワークフローは、一時停止-再生-巻き戻しのサイクルをなくします。それは、コンテンツとあなたのノートが隣り合わせに存在する、単一の集中できる環境を作り出します。
一貫性が鍵です。コースプラットフォーム、YouTube、さらには社内トレーニングポータルなど、ビデオがある場所ならどこでも機能するシステムが必要です。
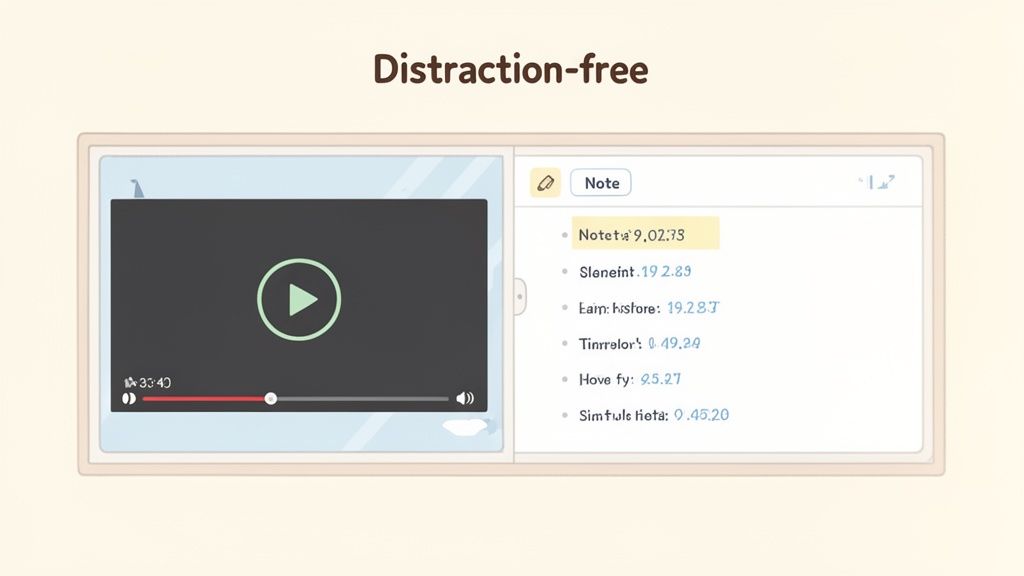
ここでブラウザベースのツールが普遍的な学習コックピットを作成できます。HoverNotesは、ビデオを一緒に視聴し、AIノートを生成し、Markdownとして直接ファイルシステムに保存するChrome拡張機能です。
その「集中モード」はシンプルなゲームチェンジャーです。ビデオを片側に、ノートエディタをもう片側に配置し、サイトの広告やその他の邪魔をブロックして集中できるようにします。
あなたの学習システムはプラットフォームに依存しないべきです。ツールについて考えることが少なければ少ないほど、コンテンツに集中できます。
このサイドバイサイドのアプローチは、スクリーンショットの混乱も解決します。必要な特定のコードスニペットや図だけを切り取って、ノートに直接埋め込むことができます。
円滑なワークフローは、あなたの思考を正確にソースマテリアルに結びつけます。「重要な図」というメモは一週間後には役に立ちません。しかし、実際の図が、それが現れた瞬間にリンクされたメモはどうでしょうか?それは永続的な学習資産です。
ここでタイムスタンプ付きスクリーンショットは譲れません。良いシステムはこれを自動的に処理します:
- ワンクリックキャプチャ: リズムを崩さずにワンクリックまたはキーボードショートカットでスクリーンショットを取得します。
- 埋め込みコンテキスト: 画像はノートの適切な場所に表示されます。
- クリック可能なタイムスタンプ: すべてのスクリーンショットはブックマークとして機能し、ビデオのその特定の瞬間にジャンプバックします。
この機能は、フラットなテキストファイルをインタラクティブな学習ガイドに変えます。
あなたのワークフローは、あなたの知識に対する完全な所有権を与えるべきです。ノートを独自のクラウドサービスに保存することは、あなた自身の思考へのアクセスをただ借りているだけです。ローカルファーストのアプローチはより堅牢です。
ノートがプレーンなMarkdown(.md)ファイルとして保存されると、それらはポータブルで永続的です。任意のテキストエディタで開くことができ、バックアップし、ネイティブツールで検索することができます。
ノートはデジタルのゴミ箱に消えてしまっては意味がありません。オンラインコースから学ぶ本当の目標は、クイズに合格することではなく、視聴するすべてのビデオとともに成長する、個人的で検索可能な知識ベースを構築することです。これは、学んだことすべての永続的なライブラリを作成することです。
Markdown(.md)のようなオープンフォーマットで知識を所有することは、ゲームチェンジャーです。あなたのノートが特定のアプリのクラウドに閉じ込められていると、そのプラットフォームが閉鎖されればあなたの知識は消えてしまう可能性があります。ローカルファーストのアプローチは、あなたが永遠にあなたの知識を所有することを意味します。
Obsidianのようなシステムを、あなたのマシン上に存在するプライベートな「第二の脳」と考えてください。ワークフローはシンプルです:ビデオから学びながら、ノートとビジュアルをキャプチャし、それらはプレーンテキストファイルとして直接あなたのObsidian保管庫に保存されます。
それらはあなたのコンピュータ上の単なるファイルなので、あなたはそれらを完全に所有します。バックアップし、検索し、どこにでも移動できます。これは、あなたがコントロールできないクラウドサービスに依存することからの根本的な転換です。
あなたの知識は個人的な資産であるべきで、企業のデータベースの一時的なエントリではありません。あなたはファイルを所有します。移動し、バックアップし、grepします—それらはただのMarkdownです。
このワークフローは、散らかったノートを統合された知識システムに変えます。時間が経つにつれて、Pythonチュートリアルのノートをデータサイエンスコースの概念にリンクさせ、相互に関連するアイデアのウェブを構築することができます。さらに深く掘り下げるには、知識ベースの作成方法に関するガイドをご覧ください。
#ObsidianとNotionユーザーのための実践的なワークフロー
- 豊かで視覚的なノートをキャプチャする: YouTube、Coursera、またはローカルファイルでビデオを視聴しながら、あなたの思考と画面上のビジュアルの両方をキャプチャするツールを使用します。画面全体を取得するよりも、特定のコードブロックを切り取る機能の方がはるかに便利です。
- Markdownとして直接保存する: 埋め込まれた、タイムスタンプ付きのスクリーンショットを含むあなたのノートは、直接
.mdファイルとして保存されるべきです。HoverNotesのようなツールは、ノートを.mdファイルとして直接あなたのObsidian保管庫に保存します。独自のフォーマットや同期サービスは必要ありません。
- リンクと整理: Obsidianに入ったら、本当の作業が始まります。主要な概念を他のノートにリンクし、トピックごとにタグ付けし、より広範な要約に埋め込みます。「JavaScriptのPromise」に関するノートは、今や「非同期プログラミング」に関するあなたのノートに直接リンクできます。
Notionユーザーにとっても、プロセスは同様に簡単です。うまく設計されたキャプチャツールは、書式、見出し、画像を含むあなたのノートがNotionページにきれいにコピーされることを保証します。
これは単に整理整頓されているということだけではありません。あなたがコントロールする検索可能な知識資産を構築し、学習に投資した時間が何年にもわたって報われることを保証することです。
オンラインコースからより多くを得るための一般的な質問に取り組みましょう。
間隔反復を使用してください。24時間以内にノートを見直し、その後3日後、1週間後、1ヶ月後に再度見直します。これは自然な「忘却曲線」と戦い、知識を長期記憶に固定します。見直すときは、能動的想起を使用してください:ノートを見る前に、記憶から概念を説明しようと試みます。
#ノートは手書きとコンピュータのどちらが良いですか?
手書きは概念的な理解を助けることができますが、ビデオ学習においてはデジタルが明らかに勝者です。クリック可能なタイムスタンプ付きスクリーンショットでノートをビデオの視覚的文脈に直接リンクできる唯一の方法だからです。これは、コーディングやデザインのような複雑で視覚的なトピックを学ぶ上で非常に重要です。
#視聴した内容を覚えるための最良の方法は何ですか?
能動的なノートテイキングと即時の応用を組み合わせてください。講師が言うことを単に書き写すだけでは、忘れるためのレシピです。
- 一時停止して言い換える: 主要な概念の後、ビデオを停止します。そのアイデアを自分の言葉で表現します。その際、視覚的な文脈のために画面上のアクションのスクリーンショットを取得します。
- 即座に適用する: コードエディタを開いてコードを書きます。デザインテクニックであれば、それを再現しようとします。
この想起と実践のタイトなループが、新しい知識を自分のものにする最も信頼できる方法です。
すべてをNotionで管理している場合、ノートはきれいにコピーされます。学習にObsidianを使用している場合、HoverNotesはノートを直接あなたの保管庫に保存します。無料で試すことができます—クレジットカード不要で20分間のAIクレジット。詳細はhttps://hovernotes.ioでご覧ください。
GeneralJanuary 23, 2026
Obsidian YouTubeノートのための強力なワークフローを構築しましょう。動画から得た知識を効率的に記録、整理、リンクさせ、実際に記憶に残す方法を学びます。
GeneralDecember 31, 2025
YouTubeやCourseraでの学習効果を高めるためのコーネル式ビデオノート術の使い方を学びましょう。このガイドでは、すぐに実践できる手順とテンプレートを紹介します。
GeneralDecember 18, 2025
AIワークフロー、Markdownテンプレート、視覚的なスクリーンショットを使ってビデオ講義から学習ガイドを作成する方法を学び、記憶の定着率を高め、学習を効率化します。