Ves un tutorial de una hora, asintiendo, seguro de que lo has entendido. Al día siguiente, no recuerdas casi nada.
Esto no es un fallo personal; es la curva del olvido de Ebbinghaus. La investigación muestra que sin reforzar lo que aprendemos, podemos perder hasta el 70% de la nueva información en 24 horas.
Por Qué Olvidas los Videos Minutos Después de Verlos
La visualización pasiva no construye la memoria. Ver un video sin tomar apuntes es como escuchar una canción una vez y esperar saber toda la letra. No funciona. Para que la información se fije, tu cerebro necesita interactuar con ella: procesar, cuestionar y conectar ideas.
La mayoría de nosotros intentamos resolver esto tomando notas, pero el proceso manual es tedioso. Pausar y reanudar constantemente rompe tu concentración. Manejar un cuaderno físico mientras ves un video es incómodo e ineficiente. Peor aún, estos métodos manuales a menudo conducen a malos hábitos.
El Problema de las Notas Dispersas
Estos hábitos de toma de notas parecen productivos en el momento, pero fallan cuando necesitas la información más tarde. ¿Te suena familiar alguno de estos?
- Cementerios de Capturas de Pantalla: Tu escritorio está lleno de capturas de pantalla de diagramas o código. Terminan en una carpeta aleatoria, desconectadas de tus notas e imposibles de encontrar cuando las necesitas.
- La Transcripción Literal: Intentas escribir cada palabra que dice el orador. Estás tan concentrado en transcribir que te pierdes el significado real.
- Documentos Digitales Caóticos: Tienes un documento masivo y divagante para todo un curso. Es un revoltijo de pensamientos que es una pesadilla revisar para un examen.
Estos métodos fallan porque carecen de estructura. Son una recopilación pasiva, no un aprendizaje activo. Terminas con una pila de datos, no con un cuerpo de conocimiento.
Para aprender de un video, necesitas un sistema que te obligue a pensar, no solo a copiar. Si quieres profundizar, consulta nuestra guía sobre cómo estudiar eficazmente para los exámenes. Aquí es donde adaptar un método académico probado para video marca toda la diferencia.
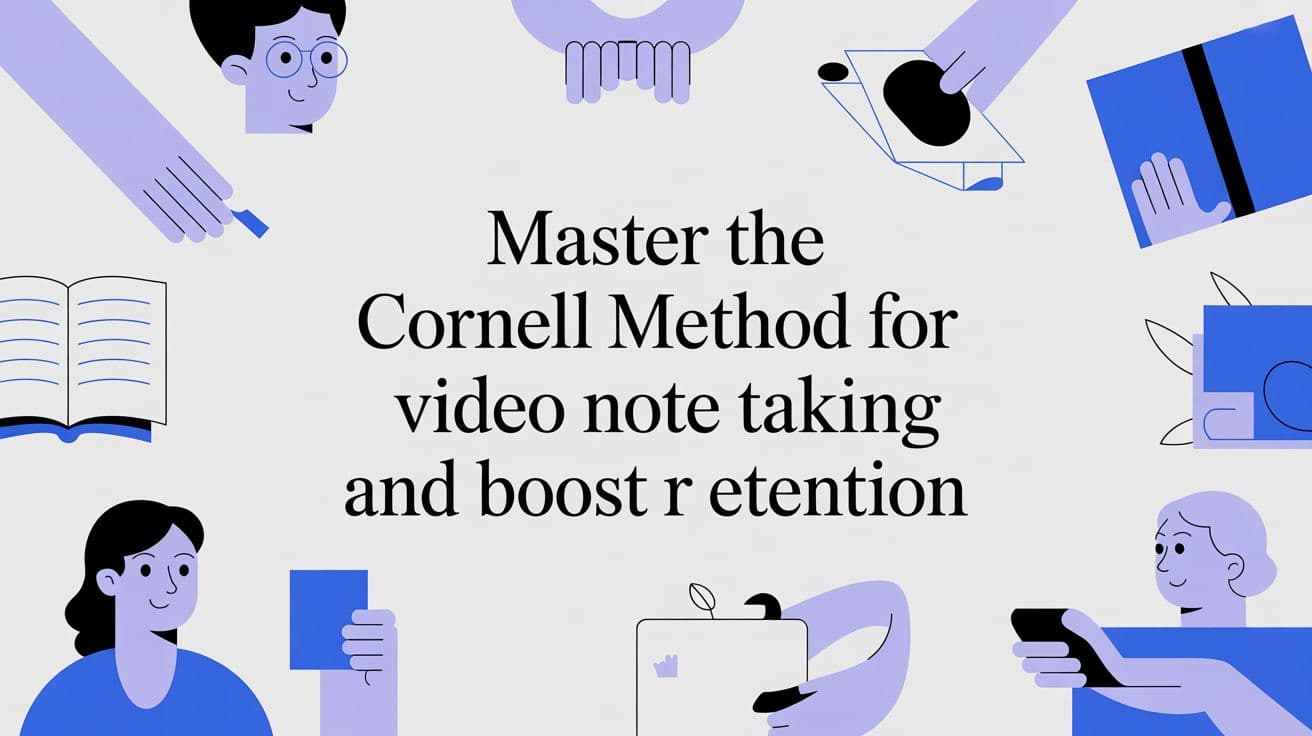
Adaptando el Método Cornell para el Aprendizaje Moderno con Video
El método Cornell es un marco simple para aprender de un video, no solo para verlo. Su poder proviene de una estructura de tres partes que te obliga a interactuar con el material.
Desarrollado en la década de 1950 por el profesor de Cornell Walter Pauk, el sistema fue diseñado para ayudar a los estudiantes a organizar y retener información. Los primeros estudios mostraron que los estudiantes que lo usaban mejoraban sus calificaciones en los cuestionarios en un 30-50% en comparación con aquellos que tomaban notas lineales.
El método se basa en la recuperación activa, una técnica probada para mejorar la memoria a largo plazo. En lugar de releer las notas, te ves obligado a extraer información de tu cerebro. Puedes encontrar muchos expertos en educación que desglosan el método y la ciencia cognitiva detrás de él.
La Estructura de Tres Partes para Video
El sistema divide tu página digital, ya sea un archivo Markdown en Obsidian o una página en Notion, en tres zonas. Cada una tiene un trabajo específico para convertir la información en pantalla en conocimiento que perdura.
Así es como funciona cada sección al tomar notas de un video en Coursera, Udemy o una grabación de una conferencia.
Cómo Estructurar Tus Notas de Video con el Método Cornell
Esta tabla desglosa cada sección del método Cornell y su función para aprender de un video.
| Sección de Cornell | Propósito para las Notas de Video | Contenido de Ejemplo |
|---|---|---|
| Notas Principales | Esta es tu zona de captura en vivo. Mientras miras, anota conceptos clave, definiciones y detalles importantes. | Un fragmento de código de un tutorial de Python, una fecha histórica clave de una conferencia o una fórmula explicada en una pizarra. |
| Columna de Pistas | Esta columna estrecha a la izquierda es para las indicaciones de recuperación. Después de ver un segmento, escribe aquí preguntas o palabras clave que se conecten con tus notas principales. | "¿Por qué usar un bucle for aquí?" o "¿Causas principales del conflicto?" o "¿Para qué sirve la propiedad box-sizing?" |
| Resumen | Esta sección inferior es para la síntesis. Una vez que termine el video, resume todo el tema en 1-2 oraciones, con tus propias palabras. | "Este video explicó cómo usar CSS Flexbox para crear diseños responsivos manipulando los ejes principal y transversal." |
Esta estructura puede parecer rígida, pero resuelve el mayor problema del aprendizaje con video: el consumo pasivo. No puedes simplemente transcribir sin pensar lo que escuchas.
La sección de Notas Principales captura la información, pero el verdadero aprendizaje ocurre en las secciones de Pistas y Resumen.
La columna de Pistas es la parte más importante de la aplicación del método Cornell para la toma de notas en video. Te obliga a revisar tus notas y a cuestionar activamente el material, que es el paso exacto que consolida la información en tu memoria.
Al separar estas acciones, pasas de ser un espectador a un participante activo. Convertir una nota en una pregunta o resumir un tema complejo crea conexiones mentales que están ausentes cuando simplemente presionas "reproducir".
Tu Guía Práctica para Tomar Notas de Video con el Método Cornell
El método Cornell es un sistema para capturar, cuestionar y recordar lo que ves. Analicemos cómo poner en práctica esta técnica para cualquier video del que estés aprendiendo.
Primero, aquí tienes un recordatorio visual del diseño.
Esta estructura convierte tus notas de un registro pasivo en un sistema de aprendizaje activo.
Captura Ideas Clave en el Área de Notas Principales
Mientras se reproduce el video, la columna grande de la derecha es tu zona de captura en vivo. Evita transcribir todo. Tu objetivo es capturar conceptos centrales, definiciones importantes y ejemplos clave.
Aquí es donde la mayoría de la gente se atasca. Pausar, rebobinar y tomar capturas de pantalla manualmente es tedioso y rompe tu flujo. Aquí es donde una herramienta dedicada ayuda. HoverNotes es una extensión de Chrome que ve videos contigo, genera notas con IA y las guarda como Markdown directamente en tu sistema de archivos. Te permite tomar instantáneamente una captura de pantalla con marca de tiempo de un diagrama o usar la captura de fragmentos para extraer un bloque de código específico directamente a tus notas. Cada captura de pantalla incluye una marca de tiempo en la que se puede hacer clic: un clic te devuelve a ese momento exacto en el video.
Llena la Columna de Pistas Después de Ver
Este paso es el más poderoso, y el que más a menudo se omite. Después de haber visto una parte lógica del video, tal vez 5-10 minutos, haz una pausa. Ahora, concéntrate en la estrecha columna de pistas de la izquierda.
Revisa tus notas y escribe preguntas o palabras clave que tus notas respondan. Esto obliga a tu cerebro a volver a interactuar con el material y comenzar el proceso de recuperación activa.
Al esperar hasta después de un segmento para escribir tus pistas, pasas de ser un mero escriba a un aprendiz activo. Este único hábito es lo que transforma tus notas de un simple registro en una poderosa herramienta de estudio.
La pista debe reflejar el contenido.
- Para un Tutorial de Python: Si tu nota tiene un fragmento de código para un bucle
for, una buena pista sería: "¿Cuándo debo usar un bucleforen lugar de un buclewhile?" - Para una Conferencia de Historia: Si anotaste el Tratado de Versalles, una pista podría ser: "¿Cuáles fueron las 3 consecuencias principales de este tratado?"
Este proceso prepara tus notas para futuras sesiones de estudio. Para profundizar en la creación de materiales de estudio efectivos, es posible que desees consultar nuestra guía sobre cómo tomar notas de estudio.
Sintetiza con el Resumen
Una vez que termine el video, completa la sección de resumen en la parte inferior. No se trata de enumerar los puntos principales; se trata de sintetizar.
En una a tres oraciones, describe el mensaje central del video con tus propias palabras. Si te cuesta resumirlo de manera concisa, es una señal de que aún no has comprendido completamente el material.
Este acto final es la prueba de comprensión definitiva. Te obliga a conectar las notas individuales en una imagen coherente, consolidando el conocimiento en tu mente.
Conectando Tus Notas de Video a Obsidian o Notion
Las buenas notas son inútiles si permanecen aisladas. El valor real proviene de integrarlas en un sistema de Gestión del Conocimiento Personal (PKM) donde puedan conectarse, buscarse y desarrollarse.
Para los estudiantes serios, herramientas como Obsidian y Notion son centros neurálgicos para el conocimiento. El objetivo es convertir las notas de un solo video en una parte permanente e interconectada de tu cerebro digital. Así es como las ideas de una conferencia de Coursera o un tutorial de YouTube se convierten en un recurso que posees y puedes consultar durante años.
Haciendo que las Notas de Video Funcionen en Obsidian
Los usuarios de Obsidian valoran el almacenamiento local y la propiedad de los datos. El sistema prospera con archivos de Markdown (.md) que viven en tu máquina, no en el servidor de una empresa. El formato de salida de tu herramienta para tomar notas es fundamental.
Una herramienta como HoverNotes está diseñada para este flujo de trabajo. Funciona en cualquier sitio web con video: plataformas de cursos, YouTube e incluso portales de capacitación internos.
- Directo a la Bóveda: Puedes configurar HoverNotes para que guarde su salida directamente en tu bóveda de Obsidian. No se requiere copiar y pegar manualmente.
- Markdown Puro: Los archivos están en formato
.mdlimpio. Eres el propietario de los archivos. Muévelos, haz copias de seguridad, usa grep con ellos: son solo Markdown. - Vinculación Inmediata: En el momento en que una nota llega a tu bóveda, puedes vincularla al conocimiento existente usando los
[[wiki-links]]de Obsidian, construyendo una verdadera red de conocimiento.
Las capturas de pantalla con marca de tiempo capturadas por HoverNotes se incrustan directamente en el Markdown, brindándote contexto visual dentro de Obsidian. Un clic en cualquier imagen te lleva de vuelta a ese preciso momento en el video.
Para los usuarios de Obsidian, la integración sin fricciones es clave. Las notas deben llegar a tu bóveda como archivos Markdown limpios y enlazables. Este enfoque de almacenamiento local garantiza que tu base de conocimientos se mantenga privada y permanentemente tuya.
Integrando Notas de Video en Notion
Los usuarios de Notion construyen bases de datos estructuradas para organizar su aprendizaje. Aunque es diferente del enfoque de almacenamiento local de Obsidian, la necesidad de notas bien formateadas y transferibles es la misma. La estructura de Cornell funciona perfectamente dentro de las listas desplegables y bases de datos de Notion.
Puedes copiar tus notas estructuradas en Markdown de una herramienta como HoverNotes y pegarlas directamente en una página de Notion. El formato (encabezados, viñetas y texto en negrita) se transfiere limpiamente, preservando la estructura de la nota sin una limpieza manual.
Esto te permite colocar resúmenes de video en una base de datos de "Notas del Curso", etiquetarlos con temas relevantes y vincularlos a páginas de proyectos. Si estás construyendo una biblioteca digital completa, nuestra guía sobre cómo crear una base de conocimiento puede proporcionar un marco sólido.
Usando la Recuperación Activa para Recordar Realmente lo que Aprendiste
Las buenas notas son inútiles si nunca las revisas. Su poder no está en capturar información, sino en ayudarte a recuperarla más tarde. El método Cornell está diseñado para el aprendizaje activo, no para el acaparamiento pasivo.
El proceso es simple. Cubre la sección de notas principales. Mira solo las preguntas y palabras clave en la columna de pistas. Intenta responder cada pregunta en voz alta o escribe la respuesta de memoria.
Esa lucha es donde ocurre el aprendizaje. Estás realizando una recuperación activa, extrayendo información de tu memoria. Esto fortalece las vías neuronales y hace que el conocimiento se fije. Releer pasivamente las notas es como ver a otra persona levantar pesas; se siente productivo, pero no estás desarrollando ningún músculo.
Luchando contra la Curva del Olvido con la Repetición Espaciada
La recuperación activa es poderosa, pero combinarla con la repetición espaciada crea un sistema imbatible para el aprendizaje a largo plazo. La idea es revisar tus notas a intervalos crecientes, deteniendo en seco la "curva del olvido".
Sin esto, podemos olvidar hasta el 60% de lo que aprendimos después de solo un día. El método Cornell es un contraataque directo. Un metaanálisis de más de 50 estudios encontró que los estudiantes que usaban métodos estructurados para tomar notas obtenían, en promedio, un 34% más en los exámenes.
Aquí hay un horario práctico:
- Día 1: Revisa tus notas dentro de las 24 horas. Usa tu columna de pistas para ponerte a prueba.
- Día 3: Revisa las notas de nuevo. Ya será más fácil recordar las respuestas.
- Día 7: Otra revisión rápida. Concéntrate en las preguntas que te dieron problemas.
- Día 30: Un último repaso para fijar la información en tu memoria a largo plazo.
Este ciclo convierte tus notas de video de un documento estático en una herramienta de estudio dinámica. Estás construyendo una base sólida de conocimiento que realmente puedes usar. Si quieres construir sistemas de estudio efectivos, consulta nuestra guía sobre cómo hacer una guía de estudio que realmente funcione.
Errores Comunes a Evitar al Tomar Notas de Video
Adoptar el método Cornell es un gran primer paso, pero algunas trampas comunes pueden socavar tus esfuerzos.
El mayor error es intentar transcribir el video. Tu objetivo no es un guion palabra por palabra; es extraer grandes ideas y conectarlas. Cuando solo escribes lo que escuchas, no estás pensando. Si necesitas una transcripción completa, usa una herramienta dedicada. Nuestra guía sobre cómo obtener una transcripción de un video de YouTube te guía a través de tus opciones.
Apresurarse en la Columna de Pistas
Otro error común es llenar la columna de Pistas mientras estás viendo el video. Esto frustra el propósito. Esa columna es para la recuperación activa. Debes ver un fragmento, reflexionar sobre tus notas y luego formular preguntas. Hacerlo en vivo solo lo convierte en otro ejercicio de transcripción.
Igual de malo es escribir pistas simplistas. Una pista de una palabra como "Flexbox" es inútil para autoevaluarse. Una mejor pista obliga a tu cerebro a trabajar: "¿Cuál es la diferencia entre justify-content y align-items?" Las buenas pistas exigen una respuesta real.
El mayor error de todos es crear notas meticulosas y luego no volver a mirarlas nunca más. Tus notas son una herramienta de aprendizaje, no un trofeo.
Todo el sistema Cornell está diseñado para la revisión. La investigación muestra que revisar las notas dentro de las 24 horas es crucial para combatir la curva del olvido. Las revisiones espaciadas pueden aumentar la retención hasta en un 200%. Este video sobre cómo las estructuras para tomar notas ayudan a la retención es una excelente introducción a la ciencia. Construir ese hábito de revisión convierte tus notas en una base de conocimientos que realmente funciona para ti.
Preguntas Comunes Sobre el Método Cornell para Video
Aquí hay respuestas rápidas a las preguntas más comunes sobre la adaptación de este sistema para video.
¿Con qué Frecuencia Debo Pausar el Video?
No hay un número mágico, pero un buen punto de partida es pausar después de que se cubra cada idea principal, generalmente cada 5-10 minutos. Para un tutorial de codificación denso o una conferencia científica compleja, es posible que pauses con más frecuencia. Encuentra un ritmo que te permita capturar un pensamiento completo sin interrumpir tu concentración cada 30 segundos.
¿Realmente Puedo Usar Esto para Cualquier Tipo de Video?
Sí. El método Cornell es un marco flexible para pensar.
Para un tutorial de codificación, tus notas principales pueden ser fragmentos de código, mientras que tus pistas podrían ser preguntas como: "¿Por qué elegir esta función en lugar de otra?" Para un documental de historia, tus notas serían eventos clave y tus pistas podrían ser: "¿Cuáles fueron las consecuencias a largo plazo de esta decisión?" Funciona porque refleja el proceso de aprendizaje: absorber, cuestionar y resumir.
¿Necesito una Aplicación Especial para Esto?
Puedes comenzar con un simple editor de texto o un cuaderno. Pero rápidamente te encontrarás con fricciones: pausas constantes, rebobinados y capturas de pantalla incómodas.
Una herramienta creada para el trabajo, como HoverNotes, marca una gran diferencia. Se encarga de las partes tediosas, como capturar capturas de pantalla con marca de tiempo y generar notas con IA, para que puedas concentrarte en comprender el contenido. A diferencia de las herramientas que solo analizan transcripciones, HoverNotes observa el video para capturar lo que realmente está en la pantalla.
Incluso sin las funciones de IA, el modo de video sin distracciones y las capturas de pantalla con un solo clic valen la pena. Resuelven las mayores frustraciones de la toma de notas manual de video.
La función de captura de pantalla con marca de tiempo en HoverNotes por sí sola puede ahorrarte horas de buscar en los videos. Puedes probarlo gratis con 20 minutos de créditos de IA, sin necesidad de tarjeta de crédito, en https://hovernotes.io.