Schermate nitide dai video YouTube: una guida pratica | HoverNotes
General30 novembre 2025•Updated: 16 luglio 2026
Schermate nitide dai video YouTube: una guida pratica
Pārstāj iegūt izplūdušus ekrānuzņēmumus no YouTube video. Uzzini, kā iegūt asus, augstas izšķirtspējas kadrus jebkurā ierīcē savām piezīmēm un projektiem.
Di HoverNotes Team•15 min di lettura
Ci sei già passato. Metti in pausa un tutorial nel momento perfetto, premi la scorciatoia per lo screenshot e l'immagine risulta sfocata, inutilizzabile.
È una frustrazione comune quando si cerca di catturare un diagramma, una riga di codice o una slide importante per gli appunti. Rovina completamente il flusso di apprendimento. Ma prima di poter risolvere il problema, devi capire cosa lo causa.
La maggior parte delle volte, il problema non è il tuo computer né lo strumento che usi. È il flusso video stesso. Una volta che sai cosa cercare, potrai ottenere immagini cristalline ogni volta.
#Perché i tuoi screenshot di YouTube appaiono sfocati
Analizziamo i due principali colpevoli dietro quelle catture deludenti e di bassa qualità.
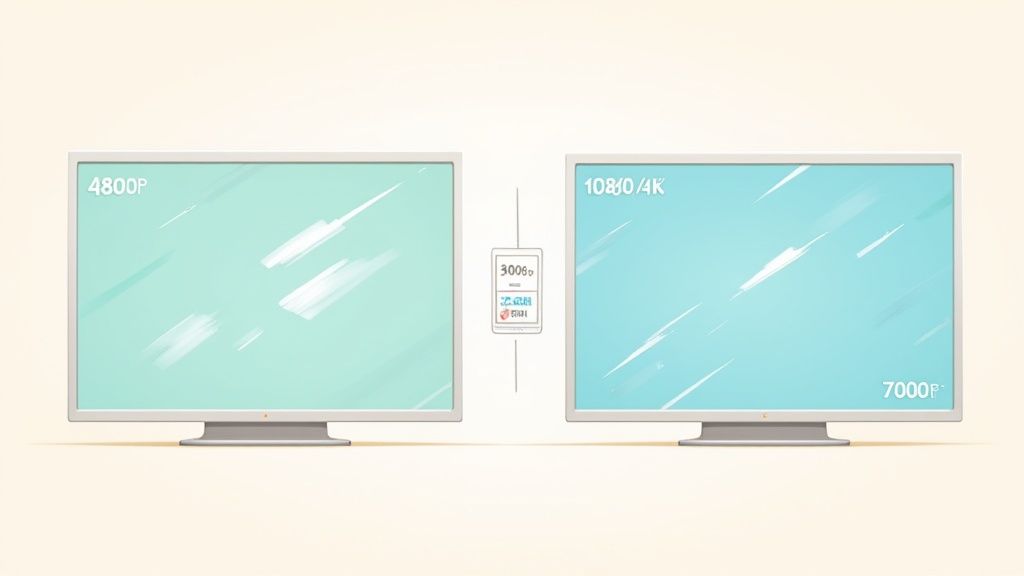
La ragione principale per screenshot sfocati è la qualità di riproduzione del video. Per risparmiare banda, specialmente in connessioni lente, YouTube spesso utilizza di default una risoluzione più bassa come 480p o 720p.
Se fai uno screenshot di un video a 480p, otterrai sempre un’immagine a bassa risoluzione. Non importa quanto sia nitido il tuo monitor.
Per risolvere, clicca sull’icona dell’ingranaggio nel player YouTube e trova l’impostazione "Qualità". Se è su "Auto", YouTube potrebbe abbassare silenziosamente la risoluzione. Prendi il controllo selezionando manualmente l’opzione più alta disponibile—1080p, 1440p o anche 4K. Questo forza il player a trasmettere un’immagine molto più nitida, offrendoti una fonte migliore per le catture.
Uno screenshot può essere nitido al massimo quanto il singolo frame video da cui viene catturato. Partire dalla risoluzione più alta possibile è il modo più efficace per migliorare la qualità dell’immagine.
#Sfocatura da movimento e sovrapposizioni del player
Un altro problema frequente è catturare un frame mentre c’è ancora un minimo movimento. Anche una frazione di secondo di spostamento tra i frame può introdurre una sfocatura da movimento sufficiente a rendere il testo illeggibile. Assicurati sempre che il video sia completamente in pausa prima di scattare.
Allo stesso modo, l’interfaccia di YouTube — linea temporale, titolo video e controlli di riproduzione — può interferire. Questi elementi di solito svaniscono, ma fare uno screenshot troppo in fretta può fissarli nell’immagine. Questa è una frustrazione tipica del metodo manuale: aspettare che l’interfaccia sparisca rompe il ritmo degli appunti.
#Padroneggiare gli screenshot manuali su qualsiasi dispositivo
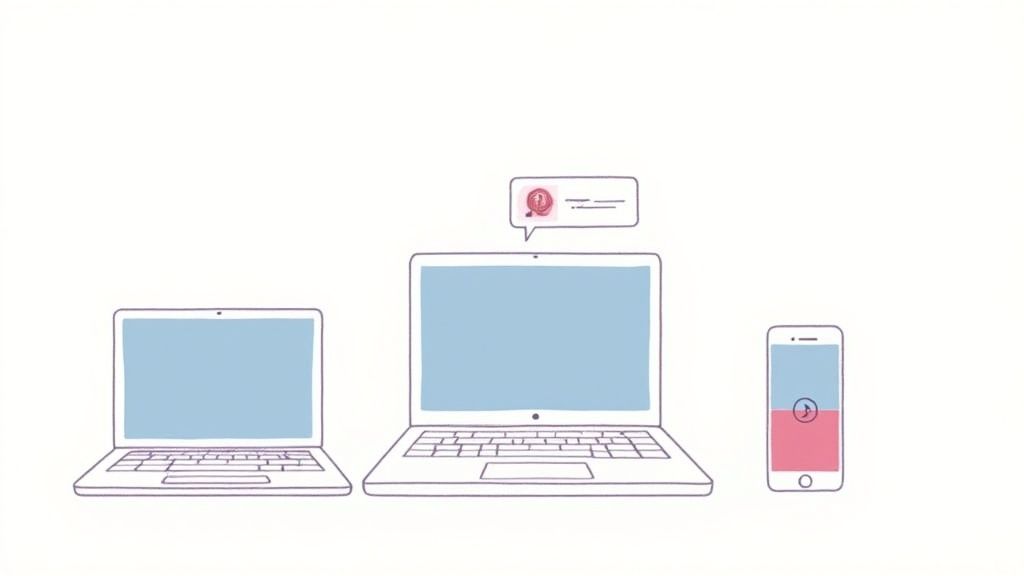
Prima di passare a strumenti più avanzati, impariamo le basi. Ogni dispositivo che possiedi ha un modo incorporato per fare uno screenshot, e conoscere queste scorciatoie è una competenza pratica utile ben oltre la cattura di clip da YouTube.
Considerale come la tua risorsa affidabile di riserva. Sono gratuite, funzionano ovunque e ti mettono al controllo diretto. Anche se non sono il modo più efficiente di prendere appunti video, è fondamentale padroneggiarle.
Per chi usa Windows o Mac, le scorciatoie da tastiera sono il modo più veloce per catturare un frame. Nessuna installazione, nessun problema—solo risultati immediati.
Su Windows, la scorciatoia moderna da conoscere è Win + Shift + S. Questa apre uno strumento di selezione che ti permette di disegnare un riquadro esattamente intorno a ciò che vuoi catturare. Perfetto per prendere solo il player video senza tutto il disordine di tab del browser e barra delle applicazioni. L’immagine va direttamente negli appunti, pronta per essere incollata.
Gli utenti Mac hanno strumenti analoghi. Premendo Cmd + Shift + 4 il cursore diventa un mirino con cui puoi selezionare l’area perfetta. Se serve lo schermo intero, Cmd + Shift + 3 lo cattura all’istante. Entrambi salvano l’immagine come file nuovo direttamente sul desktop.
Un errore comune è catturare l’intero schermo quando ti serve solo il video. Usare sin dall’inizio una scorciatoia per selezionare la regione come Win + Shift + S o Cmd + Shift + 4 ti dà un’immagine pulita e ti risparmia di doverla ritagliare dopo.
#Una rapida panoramica delle scorciatoie da tastiera
Per rendere tutto ancora più semplice, ecco una tabella con le scorciatoie più comuni per catturare lo schermo.
Sistema Operativo
Scorciatoia
Tipo di cattura
Windows
Win + Shift + S
Seleziona regione
Windows
PrtScn
Schermo intero (appunti)
macOS
Cmd + Shift + 4
Seleziona regione
macOS
Cmd + Shift + 3
Schermo intero
Tieni a mente queste scorciatoie e avrai sempre un modo rapido per catturare ciò che ti serve.
Fare uno screenshot su telefono o tablet è altrettanto semplice, anche se la combinazione di tasti può variare a seconda del dispositivo.
La maggior parte dei telefoni Android: premi contemporaneamente i tasti Accensione + Volume giù.
iPhone moderni (senza tasto Home): premi rapidamente insieme i tasti Lato + Volume su.
iPhone più vecchi (con tasto Home): premi contemporaneamente i tasti Home + Accensione.
Dopo lo scatto appare una piccola anteprima; puoi toccarla per ritagliare, annotare o condividere subito. Va bene per inviare velocemente un’immagine a un amico, ma diventa macchinoso se devi catturare molti frame per gli appunti.
#Consigli professionali per uno screenshot perfetto e di alta qualità
Conoscere la scorciatoia non basta. Come sistemi il frame prima di catturarlo fa una differenza enorme sulla qualità finale. Qualche accorgimento può trasformare uno screenshot sfocato in un’immagine nitida per i tuoi appunti.
Metti sempre in pausa prima: regola d’oro. Non tentare mai di fare screenshot mentre il video sta girando. Anche un minimo movimento causa sfocatura.
Alza la qualità: prima di tutto clicca sull’ingranaggio del player YouTube e porta la risoluzione al massimo, cerca 1080p o addirittura 4K.
Passa alla modalità schermo intero: premi il tasto ‘F’ sulla tastiera. Questa azione ingrandisce il video a tutto schermo, eliminando distrazioni del browser e assicurandoti la risoluzione più alta possibile.
Nascondi i controlli del player: dopo la pausa, aspetta un attimo. La linea temporale, il titolo e gli altri elementi svaniranno, lasciandoti con un frame pulito del contenuto video.
Questi metodi manuali funzionano, ma hanno un grande difetto: la frizione. Ogni screenshot richiede pausa, scorciatoia da tastiera, salvataggio e importazione manuale negli appunti. Quando devi prendere decine di immagini da una lezione intensa, il processo diventa un collo di bottiglia che ostacola davvero l’apprendimento.
#Collegare gli screenshot ai tuoi appunti di studio
Prendere lo screenshot perfetto dal video è solo metà del lavoro. Una cartella sul desktop piena di file chiamati Screen Shot 2024-10-27 at 11.45.12 AM.png è un cimitero di informazioni. Hai le immagini, ma hai perso completamente il perché dietro di esse.
Il vero lavoro inizia quando trasformi quelle immagini isolate in risorse di apprendimento durature. Uno screenshot scollegato viene dimenticato quasi subito. Ma uno inserito proprio accanto ai tuoi pensieri sul tema? Quello crea un forte richiamo visivo. Questo è particolarmente vero per diagrammi, frammenti di codice o grafici complessi—quelle cose che gli strumenti basati solo su trascrizioni ignorano, perché non guardano lo schermo.
Pensa al processo standard. Metti in pausa il video, usi una scorciatoia da tastiera, e un file immagine appare sul desktop. Poi devi cambiare finestra su Obsidian o Notion, trovare il file, trascinarlo dentro e infine scrivere perché l’hai salvato.
Se fai questo 20 volte in una lezione, ti renderai conto che stai passando più tempo a gestire file che a capire i contenuti. Questo ciclo noioso di pausa, cattura, salvataggio e trascinamento crea attrito che spezza la concentrazione e scoraggia dagli appunti dettagliati. Non sorprende che tanta gente finisca per guardare passivamente: il processo attivo è troppo macchinoso.
Uno screenshot senza contesto è solo confusione digitale. Per renderlo davvero utile servono due cose: un timestamp che indichi il punto esatto nel video e una nota che spieghi il significato.
Aggiungere anche solo una breve descrizione e un timestamp trasforma un’immagine semplice in uno strumento di studio potente. Quel timestamp ti permette di tornare subito al momento preciso del video per rivedere l’idea nel contesto originale. La nota fissa perché l’hai catturata, un’enorme spinta per la memoria a lungo termine.
Proprio qui entra in gioco un tool dedicato. Immagina uno strumento che aggiunge automaticamente un timestamp cliccabile a ogni screenshot, integrandolo direttamente nei tuoi appunti. Per chi vuole costruire una base di conoscenza video, automatizzare il ciclo capture-save-drag-type è una vera rivoluzione. La nostra guida su come trasformare un video YouTube in appunti approfondisce molto questo flusso di lavoro.
#Automatizzare il flusso di lavoro degli screenshot
I metodi manuali funzionano, ma a che prezzo? Quel continuo ciclo di mettere in pausa, cercare la scorciatoia, nominare il file e trascinarlo negli appunti è un grande killer di concentrazione. Ti fa uscire completamente dal flusso di apprendimento.
Ecco perché un flusso di lavoro più intelligente e integrato può farti risparmiare tempo e, cosa più importante, mantenerti concentrato sul materiale.
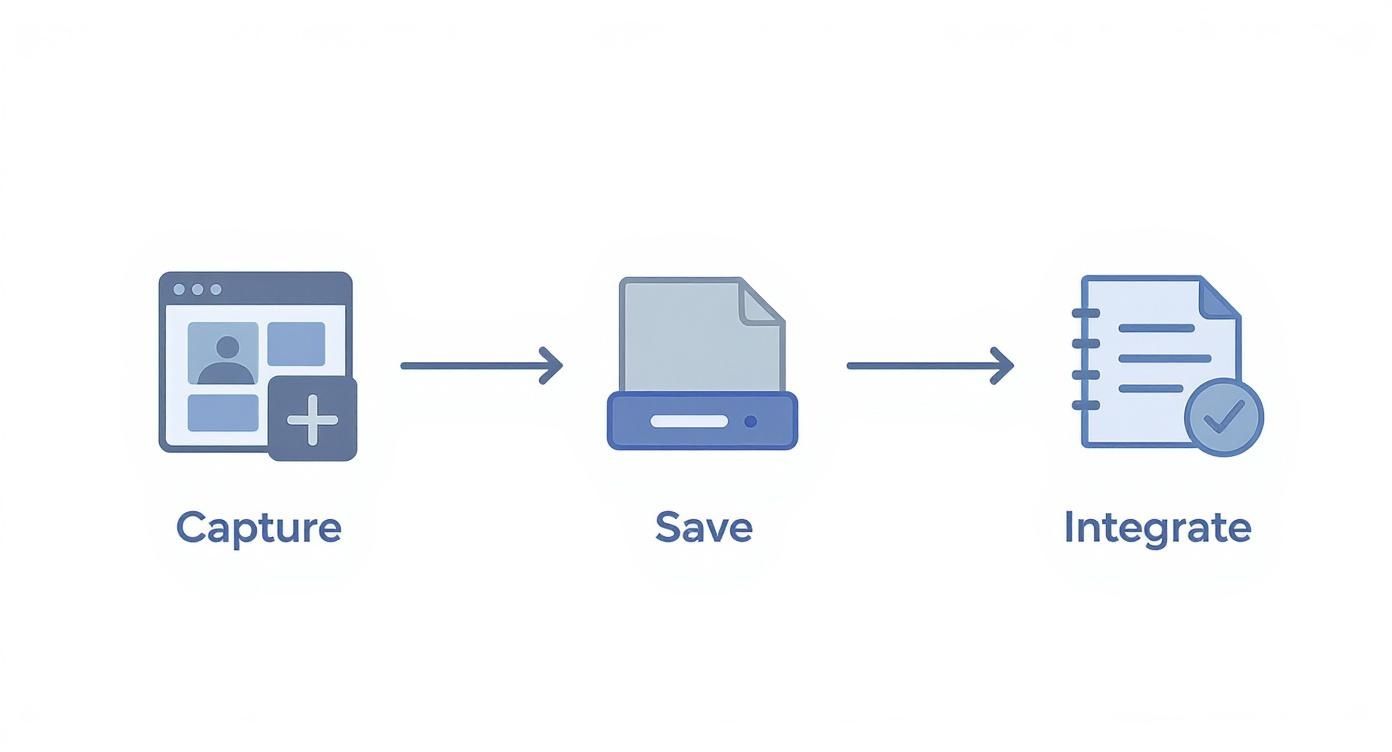
Un approccio migliore gestisce tutto il lavoro noioso per te. Invece di destreggiarti tra più app e desktop pieno di file Screen Shot 2024-10-26 at 11.45.12 AM.png, lo strumento giusto cattura il visual e lo incorpora subito nei tuoi appunti. Con un solo clic. Questo semplice cambiamento trasforma lo screenshot da fastidio a parte naturale del tuo modo di apprendere.
Questo diagramma spiega perfettamente come dovrebbe essere questo processo senza attriti.
La vera magia succede quando elimini il salvataggio e l’organizzazione manuale. Puoi catturare ciò che ti serve senza mai perdere la concentrazione.
L’obiettivo è rendere la cattura di un’immagine visiva facile quanto scrivere una frase. Uno strumento dedicato come HoverNotes, un plugin Chrome che segue i video con te, cattura screenshot che finiscono direttamente nel tuo taccuino con tutto il contesto necessario.
Invece di quella routine goffa di mettere in pausa e fare uno scatto, una singola combinazione di tasti cattura il frame corrente. Ecco cosa rende il tutto davvero eccezionale:
Timestamp cliccabili: Ogni screenshot arriva automaticamente con un timestamp cliccabile. Se devi rivedere quel concetto specifico, un clic ti riporta esattamente a quel momento nel video. Niente più scorrimenti frenetici nella linea temporale.
Incorporato nei tuoi appunti: L’immagine appare proprio dove serve, nei tuoi appunti, offrendoti il contesto visivo immediato quando studi dopo. Addio desktop disordinati pieni di file immagine sparsi.
Questa integrazione diretta ti permette di costruire un set di appunti ricco di immagini senza mai lasciare il player video.
Spesso non ti serve l’intero frame video. Potresti volere solo un blocco di codice specifico, una formula su una lavagna o una parte di un diagramma complesso. Ritagliare manualmente ogni immagine è un’altra perdita di tempo che ti distoglie dallo studio.
Gli strumenti di apprendimento più efficaci sono quelli che spariscono sullo sfondo. Il focus deve restare sul contenuto, non nella gestione di file e formattazione appunti.
Uno strumento di cattura più intelligente ti permette di essere preciso fin dall’inizio. Una funzione “Ritaglia”, per esempio, ti fa selezionare e catturare solo una regione specifica del video. Ottieni così immagini pulite e focalizzate per i tuoi appunti, senza dover aprire un editor immagini separato.
#Un flusso di lavoro costruito per utenti Obsidian e Notion
Per chi tiene davvero alla gestione della conoscenza, come e dove salvi i tuoi appunti è tutto. Molti strumenti per screenshot imprigionano le immagini nel loro cloud o in formati proprietari difficili da esportare. Questo vanifica il senso del possedere la conoscenza.
Se sei un utente Obsidian, il flusso ideale salva tutto come file locali Markdown. Questo assicura portabilità, ricerca e lunga durata degli appunti. HoverNotes salva i file .md direttamente nel tuo vault Obsidian, senza formati proprietari o servizi di sincronizzazione: gli appunti sono davvero tuoi.
Per gli utenti Notion, l’essenziale è una funzione di copia-incolla pulito. I tuoi appunti, immagini comprese, devono trasferirsi perfettamente nelle pagine Notion senza costringerti a risalvare ogni singolo screenshot uno a uno.
Automatizzare il flusso non è pigrizia, ma efficienza assoluta con la tua attenzione. Eliminando la frizione di catturare informazioni visive, rendi più facile costruire appunti completi—il che è dimostrato migliorare molto la memorizzazione.
Siamo realistici: il tuo apprendimento non avviene solo su YouTube. Pur essendo una risorsa eccellente, il materiale più importante probabilmente è sparpagliato tra Udemy, Coursera, portali universitari o registrazioni di lezioni salvate localmente.
Mettere insieme strumenti diversi—uno per YouTube, un altro per il sito del corso—è una ricetta per la frustrazione. Aggiunge attrito proprio quando hai bisogno di concentrazione.
L’obiettivo vero è costruire un sistema unico e unificato per catturare appunti visivi, ovunque si trovi il video. Pur essendo un buon punto di partenza, gli strumenti OS nativi spesso falliscono su siti con player video personalizzati o DRM. Probabilmente ti è capitato: premi per fare uno screenshot e invece ottieni un rettangolo nero inutile invece della slide desiderata.
Qui serve uno strumento più solido e versatile per chi davvero studia dai video. Ti serve qualcosa che funzioni sempre, sia che tu sia su una grande piattaforma didattica o un sito di formazione interna.
Prendi un’estensione come HoverNotes, per esempio. È costruita per funzionare su qualsiasi sito che abbia un elemento video. Questo significa imparare un unico set di scorciatoie e un unico flusso di lavoro, niente di più. Lo applichi ovunque.
Piattaforma agnostica: Funziona affidabilmente su YouTube, Udemy, Coursera, LinkedIn Learning e persino con file video locali trascinati nel browser.
Flusso coerente: Le stesse scorciatoie per catturare screenshot, ritagliare regioni specifiche o aggiungere note con timestamp funzionano universalmente. Niente più cambi di contesto.
Focus sull’apprendimento: Passi meno tempo a destreggiarti tra metodi di cattura diversi e più tempo ad interagire col materiale.
Avere un unico strumento affidabile per tutte le tue fonti video è una rivoluzione. Elimina la fatica decisionale. Non devi più fermarti a chiederti, "Qual è il modo migliore per fare screenshot qui?" Usi semplicemente lo strumento che funziona sempre.
Ma il tuo materiale più critico, quello curricolare, spesso risiede altrove. Uno strumento agnostico rispetto alla piattaforma assicura che il tuo sistema di appunti sia versatile e vario quanto le tue fonti di studio.
E se sei utente Obsidian, i benefici si moltiplicano. Uno strumento che salva i tuoi appunti come file Markdown puliti direttamente nel tuo vault da qualsiasi fonte video è un enorme miglioramento del flusso. Questo approccio locale significa che possiedi davvero la tua conoscenza, ovunque l’abbia trovata. La funzione di screenshot con timestamp da sola ti fa risparmiare ore di riavvolgimenti video per trovare quel momento preciso.
Per uso personale, praticamente sì. Pensalo come prendere appunti per una lezione o salvare un diagramma per studio personale—di solito rientra nel fair use. La parola chiave è uso personale.
Il problema sorge se usi quelle immagini commercialmente, le condividi largamente o le spacci come tue. In caso di dubbio, la regola più semplice è rispettare il copyright. Usa gli screenshot solo per studi e riferimenti personali, così stai tranquillo.
Ottenere uno screenshot nitido non è complicato, ma dipende da pochi passi consapevoli.
Aumenta la risoluzione: Prima di tutto, clicca sull’ingranaggio del player YouTube e imposta la qualità al massimo disponibile, come 1080p o 4K. Lo screenshot sarà nitido solo quanto il video di partenza.
Metti in pausa sul frame perfetto: Metti sempre in pausa il video, mai scattare mentre riproduce. La sfocatura da movimento rende testo e diagrammi illeggibili.
Vai a schermo intero: Premi ‘F’ per la modalità fullscreen. Elimina il disordine del browser e massimizza la dimensione dell’immagine, per una cattura più pulita.
Usare uno strumento dedicato alla cattura video spesso regala un’immagine più nitida di un generico screenshot di sistema, perché prende il frame direttamente.
Catturare contenuti visivi di alta qualità è più importante che mai, soprattutto quando le tendenze sulle piattaforme video cambiano rapidamente. In un’analisi di 78,4 milioni di video, il valore del contenuto visivo è stato un fattore chiave. Puoi approfondire nel dataset completo di tendenze YouTube.
#Posso fare uno screenshot senza i controlli del player?
Sì. Il metodo manuale è mettere in pausa e aspettare un attimo. La barra di riproduzione, i controlli volume e altri elementi spariranno automaticamente, lasciandoti un frame pulito.
Un metodo migliore è usare strumenti progettati per catturare solo il frame video ignorando l’interfaccia del player. È più veloce e affidabile. Se hai domande tecniche su come funzionano questi strumenti, il posto migliore è spesso una FAQ del prodotto.
La funzione di screenshot con timestamp in HoverNotes ti fa risparmiare ore di ri-visionamento. Invece di gestire file sparsi, ogni cattura è integrata direttamente nei tuoi appunti con un link cliccabile al video. https://hovernotes.io
Stanchi di screenshot sparsi ovunque? Scoprite come fare screenshot dai video con flussi di lavoro che collegano le immagini alle vostre note e migliorano il vostro apprendimento.
Crea un sistema potente para notas de cursos en línea, desde la captura y organización hasta la revisión a largo plazo, y nunca olvides lo que aprendes.
Hai difficoltà a prendere appunti nei corsi MOOC su Coursera o edX? Scopri un metodo collaudato per organizzare, memorizzare e applicare le conoscenze acquisite in corsi lunghi senza esaurirti.