Как делать заметки на курсах Coursera | HoverNotes
General9 января 2026 г.
Как делать заметки на курсах Coursera
Перестаньте забывать то, что вы изучаете на Coursera. Откройте для себя практический подход к созданию полезных, доступных для поиска заметок Coursera, которые способствуют долговременному запоминанию.
Автор HoverNotes Team•12 мин чтения
Вы это проходили. Вы усердно работаете над специализацией Coursera, успешно завершаете итоговый проект и добавляете сертификат в свой LinkedIn. Но через несколько недель знания становятся нечёткими. Отдалёнными.
Это не личная неудача; это проблема процесса. Просмотр видеолекций как сериала Netflix, набрасывая при этом несколько заметок, — верный способ забыть почти всё. У видеообучения есть проблема с запоминанием — люди смотрят, но не помнят.
#Почему большинство конспектов Coursera не работают
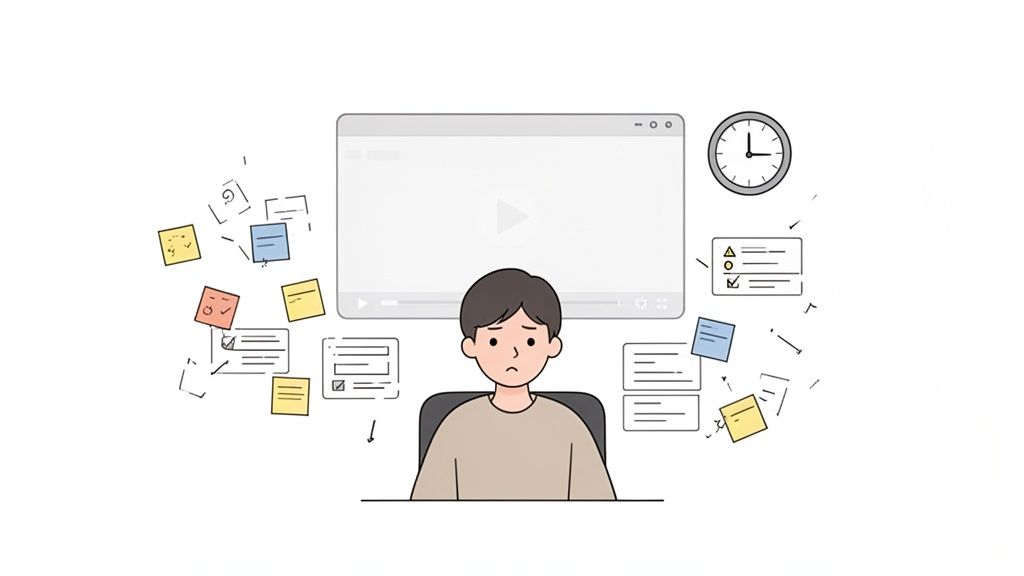
Курсы Coursera — это поток информации. Один модуль может содержать часы плотных лекций, сложные диаграммы и важные строки кода. Пытаться пассивно «впитать» все это — все равно что ловить дождь наперстком.
Это распространенная проблема. Из более чем 183 миллионов учащихся по всему миру миллионы сталкиваются с одной и той же проблемой: как заставить визуальную информацию запомниться?
Эта картина подводит итог. Вы тонете во вкладках и видео, с растущим чувством, что ничего из этого не усваивается.
Настоящий враг — это трение. Ручное конспектирование во время просмотра видео затруднено. Постоянная постановка на паузу и воспроизведение утомительны, а скриншоты оказываются разрозненными и не связанными с вашими заметками. Это трение отвлекает ваше внимание от лекции.
Давайте разберем распространенные методы.
#Сравнение распространенных методов конспектирования на Coursera
В этой таблице показаны компромиссы, на которые мы обычно идем, часто жертвуя долгосрочным запоминанием ради краткосрочного удобства.
Метод
Уровень усилий
Влияние на запоминание
Главный недостаток
Просто просмотр
Очень низкий
Очень низкий
«В одно ухо влетело, в другое вылетело». Нулевое активное участие.
Ручка и бумага
Средний
Средний
Отключено от видео; нет временных меток или визуальных эффектов.
Набор текста в документе
Средний
Низкий-Средний
Постоянные паузы и переключение контекста нарушают концентрацию.
Создание скриншотов
Низкий
Низкий
В итоге получается хаотичный набор файлов без контекста.
Использование транскрипций
Очень низкий
Очень низкий
Пропускает 100% важной визуальной информации.
Легкие пути ведут к плохим результатам. Более ручные методы лучше, но создают трения, которые мешают обучению.
Вот более пристальный взгляд на то, почему эти методы не работают:
Ловушка «Пауза и воспроизведение»: Попытка печатать заметки во время воспроизведения видео — это кошмар. Вы постоянно ставите на паузу, лихорадочно печатаете, затем перематываете назад, потому что что-то пропустили. Ваше внимание рассеивается.
Хаос скриншотов: Создание скриншотов кажется продуктивным, но это ловушка. Они превращаются в беспорядочную коллекцию файлов на вашем рабочем столе. «Скриншот-193.png» ничего не говорит вам о концепции, которую он должен был запечатлеть.
Иллюзия стенограммы: Полагаться на стенограммы — огромная ошибка. Стенограммы фиксируют слова, но упускают всю визуальную историю — преподаватель указывает на диаграмму, выделяет код или демонстрирует технику. Визуальный контекст имеет значение.
Цель состоит не только в том, чтобы транскрибировать. Цель состоит в том, чтобы создать постоянную, доступную для поиска базу знаний, которая связывает то, что вы видели, с тем, что вы слышали. Обучение тому, как делать конспекты лекций, которые действительно работают, превращает вас из пассивного зрителя в активного ученика. Ваши заметки Coursera терпят неудачу в тот момент, когда процесс мешает обучению.
Профессиональный сертификат Coursera — это марафон. Сброс всех заметок по специализации из шести курсов в один гигантский документ создает непригодный для использования беспорядок. Вам нужна система с первого дня. Смысл в том, чтобы создать личную, взаимосвязанную базу знаний, а не кладбище случайных файлов.
Если вы используете такой инструмент, как Obsidian, это покажется вам естественным. Это мощный способ организовать ваши заметки Coursera прямо на вашем компьютере.
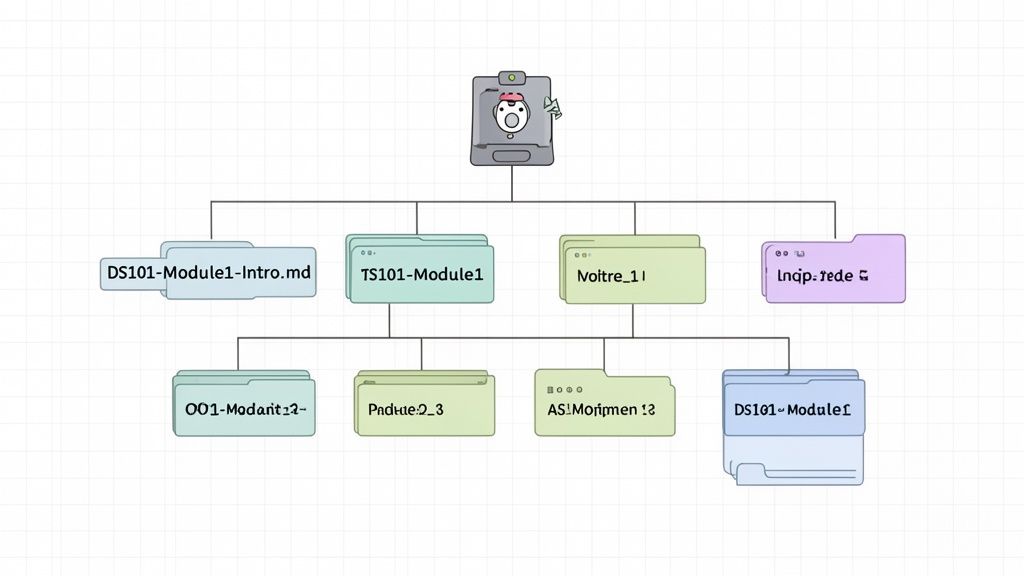
Сначала создайте основную папку для всей специализации.
Папка верхнего уровня:[Название специализации]
Пример: Сертификат специалиста по анализу данных Google
Внутри создайте пронумерованную подпапку для каждого курса. Нумерация сохраняет все в правильной последовательности обучения.
Подпапки курса:01 - [Название курса], 02 - [Название курса] и т. д.
Примеры: 01 - Основы данных: данные повсюду и 02 - Задавайте вопросы для принятия решений на основе данных.
Эта иерархия предотвращает смешивание заметок из разных курсов и упрощает поиск конкретных концепций.
#Примите последовательное соглашение об именовании файлов
Далее используйте последовательное соглашение об именовании для заметок каждой лекции. Это крайне важно для обеспечения возможности поиска ваших заметок. Надежный формат: [CourseCode]-[Week#]-[LectureTitle].md
Давайте разберем это:
[CourseCode]: Короткий, уникальный идентификатор курса (например, GDA-01).
[Week#]: Номер недели или модуля (например, W1).
[LectureTitle]: Короткое, описательное название лекции.
Реальное имя файла будет выглядеть так: GDA-01-W1-The-World-of-Data.md.
Сохраняя заметки в виде обычных файлов Markdown (.md), вы делаете их долговечными. Локальное хранение означает, что вы владеете своими знаниями навсегда. Вы можете перемещать их, создавать резервные копии или искать их с помощью инструментов командной строки — они ваши, а не заблокированы в проприетарном облачном сервисе.
Эта система преобразует ваши заметки. В таком инструменте, как Obsidian, вы можете связывать концепции между лекциями и курсами. Представьте, что лекция в Курсе 3 ссылается на концепцию из Курса 1. Вы можете создать прямую ссылку: [[GDA-01-W2-Understanding-Bias]]. Это создает сеть взаимосвязанных идей, превращая ваши заметки в настоящий второй мозг. Этот процесс превращает ваши инвестиции в сертификат Coursera в постоянный, доступный для поиска актив.
#Захват визуального контекста из технических курсов
В технической специализации Coursera — будь то наука о данных, программирование или инженерия — стенограмма упускает половину сути. Обучение происходит в тот момент, когда инструктор выделяет код, указывает на диаграмму или демонстрирует визуализацию данных. Обучение по текстовым заметкам на таких курсах сродни изучению географии без карт.
Разрыв между сказанным и показанным является огромным препятствием. В ваших заметках может быть написано «как вы можете видеть в этом обзоре модели», но сам обзор с экрана отсутствует. Эта проблема особенно остро стоит в быстроразвивающихся областях.
Возьмем, к примеру, генеративный ИИ. Согласно отчету Coursera «Global Skills Report 2025», глобальный набор на курсы по генеративному ИИ на Coursera вырос на 195% за один год, что сделало его самым быстрорастущим навыком на платформе. Эти курсы насыщены кодом и сложными визуальными материалами. Попытка вручную сделать скриншоты каждой детали, стараясь не отставать, расстраивает.
Ваши заметки должны фиксировать как «что» (объяснение), так и «где» (визуальный элемент). Если они не могут делать и то, и другое, они неполны.
#Встраивание визуальных материалов непосредственно в ваши заметки
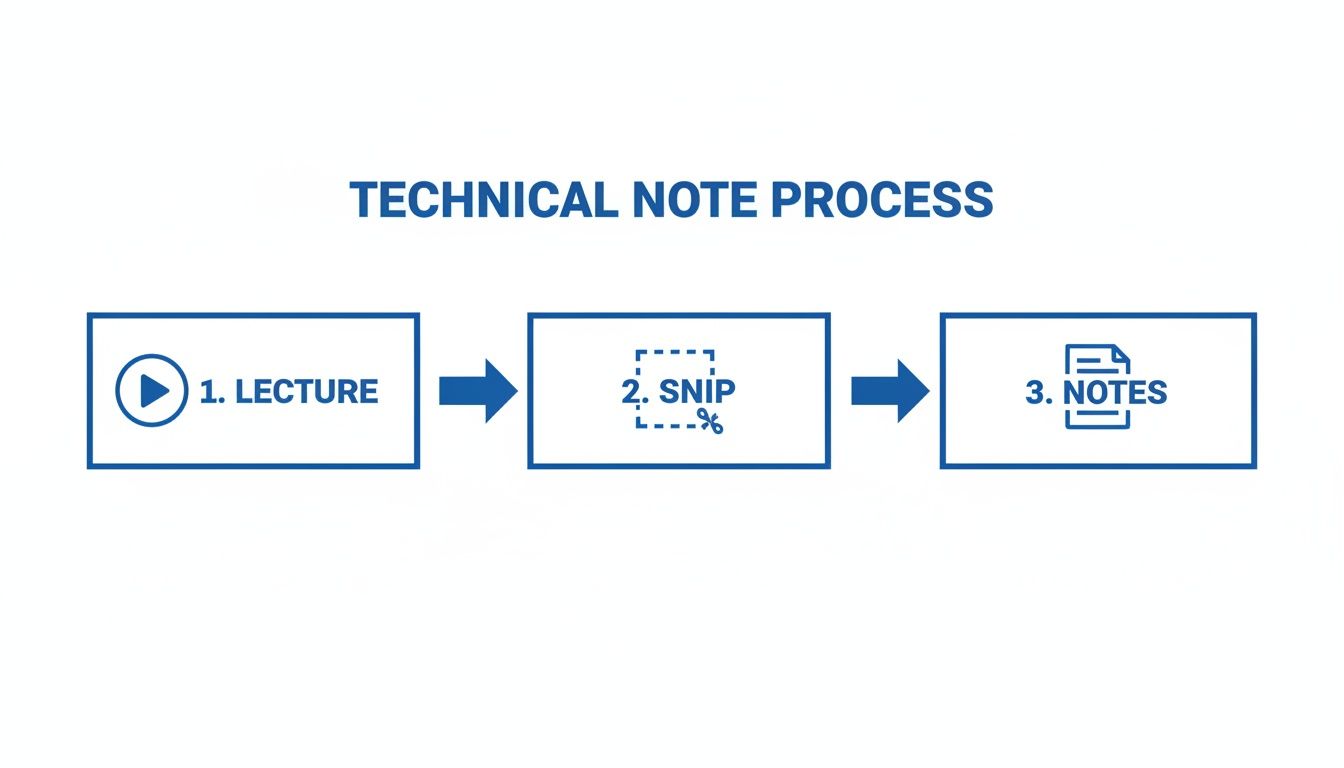
Лучший способ создавать полезные технические заметки — это встраивать визуальные доказательства наряду с текстом. Ручные методы — пауза, создание снимков экрана, вставка — создают слишком много препятствий.
Более плавный рабочий процесс использует инструмент, созданный для этой задачи. HoverNotes — это расширение Chrome, которое просматривает видео вместе с вами, генерирует заметки с помощью ИИ и сохраняет их в формате Markdown непосредственно в вашей файловой системе. В отличие от инструментов, которые только анализируют стенограммы, HoverNotes просматривает видео, чтобы зафиксировать то, что на самом деле находится на экране.
Это решает проблему визуального контекста:
Скриншоты с отметками времени: Каждый скриншот включает кликабельную отметку времени — один клик возвращает вас к этому точному моменту в видео.
Целевые вырезки: Вы можете вырезать только нужный фрагмент кода или диаграмму, вставляя чистое, сфокусированное изображение прямо в свои заметки.
Это превращает ваши заметки из плоского документа в динамичное, визуальное учебное пособие. Для получения дополнительных методов наше руководство по тому, как делать снимки экрана с YouTube, содержит советы, которые работают практически на любой видеоплатформе. Встраивание этих визуальных якорей делает просмотр сложных тем быстрее и эффективнее.
#Пусть автоматизация занимается заметками, чтобы вы могли сосредоточиться на обучении
Попытка одновременно смотреть сложную лекцию, понимать ее и печатать подробные заметки — это верный путь к когнитивной перегрузке. Ваш мозг жонглирует тремя задачами и выполняет их все плохо.
Именно здесь автоматизация меняет правила игры. ИИ может взять на себя ведение заметок, чтобы вы могли сосредоточиться на понимании. Вместо того чтобы заниматься транскрибированием, вы становитесь редактором, сосредоточенным на более важной работе — обучении. Рабочий процесс прост: позвольте ИИ записать лекцию, затем вы просматриваете, добавляете свои мысли и связываете новые идеи с тем, что вы уже знаете.
Визуальные фрагменты и структурированные заметки извлекаются непосредственно из лекции, создавая ценный учебный материал.
Такой активный, редакторский подход гораздо эффективнее для долгосрочного запоминания. За два года пандемии Coursera прибавила более 50 миллионов учащихся. Когда видеолекции стали основным форматом обучения, выявился критический пробел: количество часов, потраченных на просмотр контента, резко возросло, но усвоение знаний не поспевало за этим.
Такой инструмент, как HoverNotes, смотрит видео вместе с вами, генерируя структурированный конспект с ключевыми моментами и скриншотами с отметками времени. Он работает везде, где есть видео — на платформах курсов, YouTube и даже на внутренних учебных порталах. Для лекций, которые в основном состоят из устной речи, вы также можете рассмотреть решения для транскрибации аудио с помощью ИИ, которые превращают речь в текст с возможностью поиска. Этот процесс освобождает ваш умственный ресурс, чтобы думать о материале, а не просто записывать его.
Ваша основная задача смещается от сбора информации к ее осмыслению. Вы можете задавать вопросы и устанавливать связи — это настоящая работа по обучению. Этот метод дает вам скорость автоматизации с глубиной человеческого анализа. Наше руководство по использованию приложения для создания заметок с ИИ подробно описывает этот процесс. Даже без ИИ режим без отвлечений и скриншоты того стоят.
#Ваши заметки, ваши инструменты: рабочий процесс Obsidian и Notion
Заметки полезны только в том случае, если они находятся там, где вы мыслите. Папка со случайными файлами — это просто беспорядок. Волшебство происходит, когда идеи вплетаются в инструменты, которые вы используете каждый день.
#Сила локального подхода к рабочему процессу Obsidian
Для сообщества Obsidian владение данными имеет решающее значение. Ваши знания не должны быть заперты в облачном сервисе. Вот почему локальный подход так важен.
Когда ваши заметки сохраняются непосредственно в виде обычных файлов Markdown (.md) на вашем компьютере, они принадлежат вам. Это основной принцип такого инструмента, как HoverNotes, который сохраняет заметки прямо в вашей файловой системе.
Непосредственно в ваше хранилище: Сохраняйте файл .md — с текстом и скриншотами с отметками времени — непосредственно в ваше хранилище Obsidian.
Истинное владение: Это просто текстовые файлы. Вы можете создавать их резервные копии, искать их содержимое из командной строки и быть уверенными, что они будут читаемы через 20 лет.
Мгновенное связывание: Как только заметка попадает в ваше хранилище, вы можете связывать концепции. Свяжите новый термин из машинного обучения с заметкой о проекте или существующей статьей.
Это меняет ваш взгляд на заметки. Они становятся постоянным, накапливающимся активом. Вы владеете файлами. Перемещайте их, создавайте резервные копии, ищите с помощью grep — они просто Markdown.
Если Notion — ваш командный центр, вам нужен рабочий процесс без лишних сложностей. Хотя Notion не является локальным инструментом, как Obsidian, перенести в него заметки Coursera может быть просто.
Используйте инструмент, который с самого начала генерирует хорошо структурированные заметки. Когда заметки уже отформатированы с правильными заголовками, маркированными списками и встроенными изображениями, они переносятся без проблем. Например, заметки, созданные с помощью HoverNotes, разработаны так, чтобы их было удобно копировать и вставлять.
Выделите всю заметку — отформатированный текст и скриншоты — и вставьте ее прямо на страницу Notion. Это просто работает. Никакого утомительного переформатирования или загрузки изображений по одному. Это дает вам локальную резервную копию в формате Markdown для безопасности, пока вы используете мощные базы данных Notion для своего обучения.
Ниже приведены прямые ответы на распространенные вопросы о ведении заметок для специализаций Coursera.
#Какой формат лучше всего подходит для сохранения заметок Coursera?
Markdown (.md). Это простой текст, что делает его неустаревающим и портативным. Он отлично работает с такими инструментами, как Obsidian, позволяя вам создавать библиотеку знаний на вашем собственном компьютере. Вы владеете своими заметками вечно. Они не заперты в проприетарном приложении, которое может закрыться. Даже если вы используете Notion, сначала сделать локальную резервную копию в Markdown — это разумный шаг.
#Можно ли делать заметки к видео на Coursera на других языках?
Да, и это большое преимущество. Учиться по неуклюжим субтитрам с автопереводом расстраивает. Лучший способ — использовать инструмент с искусственным интеллектом, который грамотно справляется с переводом. Например, HoverNotes может просматривать лекцию на исходном языке, например, японском, и генерировать структурированные заметки на предпочитаемом вами языке, например, английском. Это не просто транскрипция; ИИ понимает контекст лекции, предоставляя вам связные заметки и открывая мир курсов.
#Лучше делать заметки от руки или в цифровом виде?
Хотя письмо от руки может помочь памяти, оно непрактично для скорости и технических деталей большинства курсов Coursera. Вы не сможете вставить скриншот блока кода в бумажный блокнот.
Для онлайн-обучения цифровые заметки лучше:
С возможностью поиска: Найдите любую концепцию по всей специализации за считанные секунды.
Организованные: Легко структурируйте и связывайте заметки для сертификатов, состоящих из нескольких курсов.
Интегрированные: Вставляйте скриншоты, фрагменты кода и ссылки.
Часто лучшей является гибридная стратегия. Позвольте инструменту ИИ обрабатывать необработанный захват текста и изображений. Это освобождает вас для активного участия, добавляя свои собственные цифровые аннотации и вопросы. Наше руководство по тому, как делать заметки для учебы, углубляется в другие методы.
#Как мне организовать заметки для многокурсового сертификата?
Чистая структура папок не подлежит обсуждению. Начните с основной папки для сертификата (например, «Сертификат Google UX Design»). Внутри создайте пронумерованные подпапки для каждого курса (например, «01 - Основы UX-дизайна»), чтобы все было в порядке.
Затем придерживайтесь согласованного соглашения об именовании, например [Неделя#]-[Название-лекции].md. В таком инструменте, как Obsidian, вы можете использовать теги (например, #user-personas, #figma) и обратные ссылки для связывания связанных идей между курсами, создавая взаимосвязанный граф всего, что вы изучили.
Если вы используете Obsidian для управления своими заметками Coursera, HoverNotes сохраняет их в виде чистых файлов Markdown непосредственно в вашем хранилище. Одна только функция скриншотов с отметками времени экономит часы повторного просмотра. Вы можете попробовать ее бесплатно, с 20 минутами кредитов AI и без необходимости использования кредитной карты.
Преобразите свои онлайн-курсы с помощью более умной системы заметок для Udemy. Узнайте, как фиксировать визуальные детали, оставаться организованным и действительно запоминать просмотренный материал.
Испытываете трудности с ведением заметок в MOOC на Coursera или edX? Изучите проверенный рабочий процесс для организации, сохранения и применения знаний из длительных курсов без выгорания.
Узнайте, как делать заметки на Coursera (которые вы действительно будете использовать) с помощью практичной системы для захвата, организации и сохранения знаний из видеолекций.