Cách Ghi Chú Trên Coursera (mà bạn thực sự sẽ sử dụng) | HoverNotes
General13 tháng 12, 2025
Cách Ghi Chú Trên Coursera (mà bạn thực sự sẽ sử dụng)
Khám phá cách ghi chú trên Coursera (mà bạn thực sự sẽ sử dụng) với một hệ thống thực tế để nắm bắt, tổ chức và ghi nhớ kiến thức từ các bài giảng video.
Bởi HoverNotes Team•28 phút đọc
Bí quyết để có ghi chú bạn thực sự sẽ sử dụng là xây dựng một hệ thống chủ động, không chỉ là một kho lưu trữ thụ động. Điều này có nghĩa là chuẩn bị không gian ghi chú trước khi bạn nhấn play, nắm bắt bối cảnh hình ảnh với ảnh chụp màn hình có timestamp trong bài giảng, và xem lại ghi chú ngay sau đó để củng cố kiến thức.
#Tại Sao Hầu Hết Ghi Chú Coursera Kết Thúc Trong Nghĩa Địa Kỹ Thuật Số
Bạn đăng ký một khóa học Coursera đầy hứng khởi và sẵn sàng học tập. Bạn mở một tài liệu mới hoặc sổ ghi chép, quyết tâm nắm bắt mọi khái niệm quan trọng.
Tua nhanh ba tuần. Động lực ban đầu đã biến mất. Ghi chú của bạn là một mớ hỗn loạn của những câu chưa hoàn chỉnh, ảnh chụp màn hình ngẫu nhiên lộn xộn trên desktop, và các gạch đầu dòng có ý nghĩa lúc đó nhưng giờ thì vô nghĩa.
Đây không phải là thất bại cá nhân; đây là thất bại của hệ thống. Bản thân định dạng học video khiến việc ghi chú tốt trở nên khó khăn. Bạn bị mắc kẹt trong cuộc chiến liên tục với chu kỳ pause-play-rewind, cố gắng gõ một khái niệm quan trọng trong khi một sơ đồ phức tạp đang mở ra trên màn hình. Ma sát này là lý do tại sao hầu hết ghi chú bị bỏ rơi.
Tất cả chúng ta đều đã làm điều đó. Đó là một cái bẫy gọi là "ảo tưởng sưu tập"—niềm tin sai lầm rằng chỉ vì chúng ta đã nắm bắt một mẩu thông tin, chúng ta đã thực sự học được nó. Lưu một slide hoặc bookmark một video cảm thấy hiệu quả, nhưng đó là cách để tránh công việc nhận thức khó khăn cần thiết cho sự hiểu biết thực sự.
Vấn đề thực sự là mọi người xem các khóa học video như xem TV, nhưng việc ghi nhớ thực sự đòi hỏi sự tham gia chủ động. Ghi chú rải rác chỉ là triệu chứng của vấn đề sâu xa hơn đó.
Những thất vọng này có lẽ nghe quen thuộc:
Chu Kỳ Pause-Play-Rewind: Liên tục dừng video để gõ phá vỡ sự tập trung và giết chết dòng chảy của bài giảng.
Thiếu Bối Cảnh Hình Ảnh: Ghi chú chỉ có văn bản của bạn không thể nắm bắt sơ đồ quan trọng mà giảng viên vừa vẽ hoặc dòng code chính xác họ đã highlight. Transcript bỏ lỡ những gì trên màn hình.
Ảnh Chụp Màn Hình Lộn Xộn: Chụp ảnh màn hình thì dễ, nhưng chúng kết thúc trong một thư mục ngẫu nhiên, bị ngắt kết nối khỏi ghi chú và timestamp video mà chúng thuộc về.
Hệ Thống Phân Mảnh: Ghi chú của bạn ở một app, ảnh chụp màn hình ở nơi khác, và video bị mắc kẹt trên nền tảng Coursera. Không có gì được kết nối.
Mớ hỗn độn phân mảnh này không chỉ khiến ghi chú của bạn khó sử dụng; nó khiến chúng gần như không thể học được. Bạn có thể dành hàng giờ xem bài giảng và ra đi với ít thứ để thể hiện. Hướng dẫn của chúng tôi về các vấn đề cốt lõi của học video đi sâu hơn vào những thách thức này.
Vấn đề không phải là thiếu nỗ lực. Đó là thiếu một quy trình làm việc được thiết kế cho các yêu cầu cụ thể của việc học từ video.
Dữ liệu kể cùng một câu chuyện. Báo cáo Kết quả Học viên của chính Coursera cho thấy 91% học viên định hướng nghề nghiệp đạt được mục tiêu của họ, nhưng thành công này phụ thuộc vào học tập chủ động. Học viên thụ động thấy kết quả tệ hơn nhiều, chứng minh mối liên kết giữa ghi chú tốt và lợi ích nghề nghiệp hữu hình. Bạn có thể xem phân tích đầy đủ trong báo cáo chi tiết của Coursera. Nếu không có một hệ thống vững chắc, những hiểu biết quý giá của bạn sẽ bị đưa vào nghĩa địa kỹ thuật số.
Một buổi học tuyệt vời bắt đầu trước khi bạn nhấn nút play. Lao vào một bài giảng Coursera mà không có kế hoạch giống như cố gắng nấu một bữa ăn phức tạp mà không chuẩn bị nguyên liệu trước—nó lộn xộn, chậm, và kết quả cuối cùng bị ảnh hưởng.
Dành năm phút thiết lập một hệ thống đơn giản, có thể lặp lại sẽ loại bỏ ma sát đó. Mục tiêu không phải là xây dựng một cấu trúc phức tạp của các app; mà chỉ là tạo một không gian rõ ràng, được chỉ định nơi ghi chú của bạn sẽ sống. Hành động đơn giản này kích hoạt não bạn rằng đã đến lúc tập trung.
App ghi chú của bạn là phòng thí nghiệm kỹ thuật số của bạn. Những app tốt nhất cho phép bạn kết nối ý tưởng qua các khóa học và chủ đề khác nhau. Trong khi có rất nhiều lựa chọn, Obsidian và Notion là hai trong những lựa chọn phổ biến nhất cho những người học nghiêm túc. Để có cái nhìn rộng hơn, hãy xem hướng dẫn của chúng tôi về app ghi chú tốt nhất cho sinh viên.
Cái nào phù hợp với bạn?
Đối với người dùng Obsidian, điểm thu hút chính là quyền sở hữu local-first và quyền riêng tư. Ghi chú của bạn chỉ là các file Markdown đơn giản trên máy tính của bạn. Bạn sở hữu chúng, mãi mãi.
Tạo một thư mục mới trong vault Obsidian của bạn. Một cái phổ biến là 03 - COURSES.
Bên trong thư mục đó, tạo một thư mục con cho khóa học cụ thể, như Machine Learning Specialization.
Cuối cùng, tạo một file Markdown mới cho mỗi bài giảng. Quy ước đặt tên đơn giản như 01 - Introduction to Machine Learning.md hoạt động hoàn hảo.
Đối với người dùng Notion, sức mạnh nằm ở database có cấu trúc và tính năng cộng tác.
Tạo một trang cấp cao mới gọi là Coursera Dashboard.
Bên trong trang đó, tạo một Database mới (Table view là một khởi đầu tốt).
Thêm các property để theo dõi tiến độ: Course Name (Select), Module (Text), Lecture Title (Title), và Status (Select: Not Started, In Progress, Completed).
Quá trình chuẩn bị này mất chưa đến năm phút, nhưng lợi ích rất lớn. Bạn đã trả lời câu hỏi "ghi chú này đi đâu?" mà thường xuyên giết chết động lực của bạn giữa bài giảng.
Căn cứ của bạn dành cho tổ chức kiến thức sau khi bạn đã học nó. Nhưng bạn vẫn cần một cách hiệu quả để đưa ý tưởng từ video vào hệ thống của bạn. Liên tục tạm dừng, alt-tab, gõ, và chụp màn hình phá vỡ sự tập trung của bạn.
Đây là nơi công cụ nắm bắt chuyên dụng xuất hiện. Nó là cầu nối kết nối trình phát video Coursera với ghi chú của bạn. HoverNotes là một Chrome extension xem video cùng bạn, tạo ghi chú AI, và lưu chúng dưới dạng Markdown trực tiếp vào hệ thống file của bạn. Nó có thể tự động hóa quy trình nắm bắt.
Đối với người dùng Obsidian, đây là sự kết hợp hoàn hảo. Ghi chú lưu dưới dạng file .md trực tiếp vào vault Obsidian của bạn. Không có định dạng độc quyền hay dịch vụ đồng bộ—ghi chú của bạn thuộc về bạn.
Chìa khóa là tách biệt hành động nắm bắt khỏi hành động tổ chức. Để công cụ xử lý việc nắm bắt để bạn có thể tập trung vào việc hiểu tài liệu.
Và hiểu chỉ là bước đầu tiên. Dữ liệu cho thấy 88% người có hiệu suất cao đạt được điều đó bằng cách áp dụng ngay kỹ năng mới, không chỉ tiêu thụ nội dung thụ động. Để biến ghi chú thành kiến thức thực sự, hãy thử 'Kỹ thuật Feynman' sau mỗi bài giảng: tóm tắt các khái niệm cốt lõi bằng lời đơn giản của riêng bạn. Sau đó bạn có thể tự kiểm tra mình bằng thư viện khổng lồ của Coursera với 98.2 triệu bài đánh giá.
Cách tiếp cận chủ động này hiệu quả. Nghiên cứu của Coursera cho thấy 94% người dùng AI Coach của họ cải thiện khả năng ghi nhớ bằng cách đơn giản hóa khái niệm, tăng mức độ tương tác lên 45%. Tất cả là về biến việc xem thụ động thành một bài tập học tập mạnh mẽ. Bạn có thể xem thêm chi tiết trong báo cáo kết quả học viên Coursera đầy đủ.
Được rồi, bạn đã thiết lập hệ thống của mình. Đã đến lúc nhấn play. Đây là nơi bạn biến đổi thời gian màn hình thụ động thành một buổi học chủ động.
Mục tiêu không chỉ là phiên âm những gì giảng viên nói. Bạn cần nắm bắt toàn bộ bối cảnh: các sơ đồ họ vẽ, code trên màn hình của họ, và suy nghĩ của riêng bạn khi chúng xảy ra.
Sai lầm lớn nhất mà người học mắc phải là coi bài giảng video như podcast. Phần lớn thông tin quan trọng trên Coursera hoàn toàn là hình ảnh. Một giảng viên giải thích mô hình machine learning bằng cách phác thảo decision tree, hoặc một developer live-debug code—một transcript văn bản đơn giản bỏ lỡ tất cả những điều đó.
Đây là lý do tại sao các phương pháp ghi chú cũ không hiệu quả. Bạn liên tục tạm dừng để vẽ một sơ đồ một cách vụng về hoặc chụp một ảnh màn hình đầy đủ kết thúc bị mất trên desktop của bạn, bị ngắt kết nối khỏi ghi chú của bạn. Bạn cần một cách để nắm bắt bằng chứng hình ảnh và nhúng nó ngay nơi nó thuộc về.
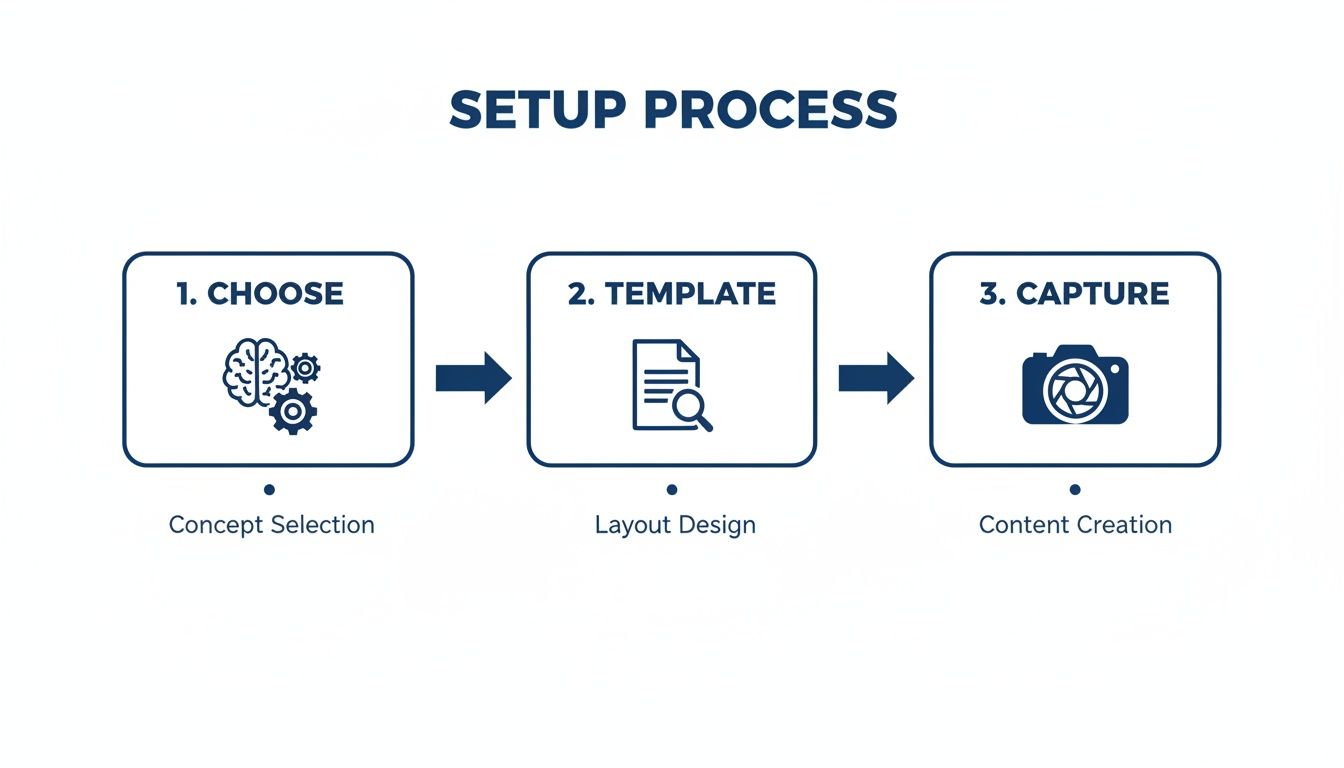
Quy trình ba bước đơn giản này cho thấy cách công việc chuẩn bị làm cho việc nắm bắt thời gian thực mượt mà hơn.
Bằng cách có sẵn một khái niệm và bố cục, bạn có thể tập trung vào việc nắm bắt thông tin, không phải loay hoay với công cụ.
Mục tiêu của bạn không phải là tạo một kịch bản từng chữ. Một transcript nguyên văn có thể là sự phân tâm, chôn vùi những hiểu biết quan trọng trong một bức tường văn bản. (Nếu bạn muốn tận dụng tối đa transcript, chúng tôi có hướng dẫn về cách phiên âm video YouTube một cách hiệu quả).
Giá trị thực sự đến từ việc chọn lọc nắm bắt những khoảnh khắc quan trọng. Một công cụ được thiết kế cho học video là người thay đổi cuộc chơi ở đây. Ví dụ, HoverNotes là một Chrome extension hoạt động trên bất kỳ website nào có video, cho phép bạn chụp ảnh màn hình với một cú nhấp chuột.
Nhưng đây là chìa khóa: không giống như ảnh chụp màn hình thông thường, mỗi lần nắm bắt được tự động gắn timestamp.
Một cú nhấp vào ảnh chụp màn hình đó trong ghi chú của bạn đưa bạn trở lại chính xác khoảnh khắc đó trong video Coursera. Tính năng này một mình tiết kiệm hàng giờ cuộn qua timeline để tìm một sơ đồ cụ thể.
Bạn thậm chí có thể sử dụng "snip capture" của nó để chỉ nắm bắt phần liên quan của màn hình—một công thức cụ thể hoặc một khối code—thay vì toàn bộ khung hình video. Những đoạn hình ảnh này xuất hiện trực tiếp trong ghi chú của bạn, cung cấp bối cảnh ngay lập tức.
Cố gắng gõ mọi điểm quan trọng trong khi xử lý một chủ đề phức tạp là công thức cho quá tải nhận thức. Bạn không thể làm cả hai tốt cùng một lúc.
Đây là công việc hoàn hảo cho trợ lý AI. Để nó xử lý công việc nặng nhọc của việc tạo một bản tóm tắt cơ bản hoặc dàn ý. Điều này giải phóng bạn cho tư duy phản biện.
Đây là cách tiếp cận thực tế, kết hợp:
Tạo Ghi Chú AI: Khi video phát, để một công cụ như HoverNotes tạo một bản tóm tắt có cấu trúc và các điểm chính. Không giống như các công cụ chỉ phân tích transcript, HoverNotes xem video để nắm bắt những gì thực sự trên màn hình.
Chú Thích Thời Gian Thực: Trong khi AI hoạt động, thêm suy nghĩ của riêng bạn. Sử dụng các tag đơn giản như [Q] cho câu hỏi hoặc [!] cho hiểu biết. Ví dụ: [Q] Tại sao anh ấy sử dụng recursive function ở đây thay vì một simple loop?
Nắm Bắt Hình Ảnh Quan Trọng: Khoảnh khắc giảng viên hiển thị một sơ đồ quan trọng, sử dụng phím tắt để chụp ảnh màn hình có timestamp.
Phương pháp này cho bạn hiệu quả của AI mà không hy sinh sự tham gia chủ động của riêng bạn. AI đặt nền móng, nhưng chú thích cá nhân và nắm bắt hình ảnh của bạn biến một bản tóm tắt chung thành một tài liệu học tập mạnh mẽ.
Ghi chú của bạn không nên chỉ là bản ghi những gì giảng viên nói. Chúng nên là bản ghi quá trình tư duy của bạn. Một trong những kỹ thuật học tập mạnh mẽ nhất đơn giản là nắm bắt câu hỏi của riêng bạn khi chúng phát sinh.
Bất cứ khi nào một khái niệm cảm thấy mờ nhạt hoặc khơi dậy một ý tưởng mới, hãy ghi lại nó.
"Tại sao learning rate được đặt thành 0.01 cụ thể?"
"Điều này liên kết trở lại khái niệm gradient descent từ Module 2 như thế nào?"
"Tôi có thể áp dụng kỹ thuật chính xác này cho dự án hiện tại của mình không?"
Những câu hỏi này biến đổi ghi chú của bạn từ một bãi đổ dữ liệu thụ động thành một không gian làm việc chủ động. Chúng trở thành danh sách việc cần làm của bạn cho buổi xem lại sau bài giảng, hướng dẫn bạn lấp đầy khoảng trống kiến thức và kết nối thông tin mới với những gì bạn đã biết.
Cách tiếp cận chủ động này có tác động có thể đo lường được. Dữ liệu của Coursera cho thấy trong khi 85% học viên sử dụng dịch máy đạt được mục tiêu nghề nghiệp, thành công này gắn liền với các công cụ tăng cường khả năng ghi nhớ. Một con số đáng kể 35% học viên báo cáo rằng AI đặc biệt giúp họ ghi nhớ tài liệu tốt hơn. Trong số hơn 52,000 người trả lời, 84% phát triển thành công các kỹ năng kỹ thuật khi ghi chú của họ giúp họ áp dụng các khái niệm—một thế giới khác biệt so với kết quả mà những người xem thụ động thấy.
Tất cả đều chỉ ra cùng một kết luận: hệ thống học tập của bạn cần hỗ trợ bạn một cách chủ động, không chỉ ghi lại những gì bạn nghe.
#Quy Trình Sau Bài Giảng Của Bạn Để Ghi Nhớ Tối Đa
Xem video chỉ là khởi đầu. Phần chuyển thông tin từ hồi tưởng ngắn hạn vào bộ nhớ dài hạn bền vững xảy ra sau khi bạn đóng tab Coursera.
Đây là nơi hầu hết mọi người thất bại. Họ hoàn thành một bài giảng, cảm thấy một cảm giác thành tựu, và tiếp tục. Ghi chú mới của họ bị bỏ lại để tích tụ bụi kỹ thuật số, và kiến thức phai nhạt. Giá trị thực sự đến từ một buổi xem lại ngắn, có chủ đích ngay sau bài giảng.
Đây không phải là về việc dành hàng giờ để tạo một bản tóm tắt hoàn hảo. Đó là một quy trình 15 phút nhanh chóng để buộc não của bạn vật lộn với tài liệu một lần nữa. Quá trình xử lý chủ động đó là điều làm cho kiến thức mới gắn kết.
Quy trình sau bài giảng của bạn cần phải nhất quán và nhanh chóng. Mục tiêu là sự tham gia, không phải sự hoàn hảo. Một quy trình đơn giản, có thể lặp lại mà bạn thực sự làm mạnh mẽ hơn một hệ thống phức tạp mà bạn chỉ sử dụng một nửa thời gian.
Đây là một danh sách kiểm tra đơn giản:
Quét Nhanh (5 phút): Khoảnh khắc bài giảng kết thúc, làm một lượt quét nhanh qua ghi chú. Đừng phân tích bất cứ điều gì sâu sắc. Đơn giản chỉ cần tiếp xúc lại não của bạn với các khái niệm chính, sơ đồ, và câu hỏi của bạn. Đó là một bài khởi động tinh thần.
Giải Thích Thành Tiếng (5 phút): Bây giờ, chọn một hoặc hai ý tưởng quan trọng nhất. Giải thích chúng bằng lời của riêng bạn, như thể bạn đang dạy một người bạn. Đây là phiên bản rút gọn của Kỹ thuật Feynman, và nó cực kỳ hiệu quả trong việc cho bạn thấy những gì bạn không thực sự hiểu.
Kết Nối Các Điểm (5 phút): Bước cuối cùng là dệt thông tin mới này vào bản đồ tinh thần hiện có của bạn. Tự hỏi mình: "Khái niệm [[Gradient Descent]] này kết nối với những gì tôi đã học về [[Linear Regression]] như thế nào?" Đây là cách bạn xây dựng một đồ thị kiến thức thực sự, không chỉ là một đống sự kiện cô lập.
Quy trình đơn giản này là một bộ nhân học tập lớn. Nó biến đổi ghi chú từ hành động thụ động ghi lại thành một quá trình hiểu biết chủ động.
Hệ thống Personal Knowledge Management (PKM) của bạn, dù đó là Obsidian hay Notion, là nơi quá trình sau bài giảng này trở nên sống động. Đây là cách bạn biến ghi chú bài giảng rải rác thành một cơ sở kiến thức gắn kết, có thể tìm kiếm được.
Đối với người dùng Obsidian, đây là nơi [[wikilinks]] là siêu năng lực của bạn. Khi bạn xem lại ghi chú, bắt đầu liên kết các thuật ngữ chính với các ghi chú khác trong vault của bạn.
Giáo sư có đề cập đến [[Stochastic Gradient Descent]] không? Liên kết nó với ghi chú nền tảng hơn hiện có của bạn về [[Gradient Descent]].
Một khái niệm có nhắc bạn về điều gì đó bạn đã đọc không? Tạo một link placeholder mới cho [[Book - Thinking, Fast and Slow]] và kết nối nó trở lại.
Mỗi liên kết củng cố sự hiểu biết của bạn và xây dựng một mạng lưới phong phú các ý tưởng liên kết với nhau. Theo thời gian, vault của bạn trở thành một wiki cá nhân hiển thị trực quan cho bạn cách các khái niệm khác nhau liên quan.
Đối với người dùng Notion, sức mạnh nằm ở các database relation. Nếu bạn đã thiết lập database khóa học chính mà chúng tôi đã nói trước đó, bây giờ bạn có thể sử dụng các relation property để kết nối ghi chú bài giảng mới của bạn.
Ví dụ, bạn có thể tạo một property Related Lectures để liên kết ghi chú hiện tại trở lại một khái niệm nền tảng từ module trước. Điều này xây dựng các đường dẫn rõ ràng, có thể điều hướng cho khi bạn đang học.
Xem lại chủ động tách biệt một người ghi chú khỏi một người học. Trong khi đăng ký các chứng chỉ chuyên nghiệp đang bùng nổ, nghiên cứu cho thấy chỉ 79% học viên thấy hiệu suất công việc được cải thiện nếu họ chủ động sử dụng ghi chú của mình.
Một cách tuyệt vời để áp dụng điều này vào thực tế là điều chỉnh Phương pháp Cornell cho ghi chú kỹ thuật số của bạn. Khi bạn xem lại, chia ghi chú của bạn thành các phần cho gợi ý, ghi chú chính, và tóm tắt. Các timestamp bạn nắm bắt có thể sống trong cột "gợi ý". Sau đó, sau khi xem lại, chưng cất toàn bộ bài giảng thành vài câu trong phần tóm tắt. Bạn có thể xem thêm dữ liệu về cách học viên Coursera đạt được mục tiêu của họ.
Hành động tóm tắt này buộc bạn xử lý tài liệu ở mức độ sâu hơn.
Bạn thậm chí có thể biến ghi chú của mình thành một hướng dẫn học nhanh sau khi hoàn thành một module. Nếu bạn đang tìm kiếm một cách có cấu trúc để làm điều này, hãy xem hướng dẫn của chúng tôi về cách xây dựng quy trình công cụ tạo hướng dẫn học mạnh mẽ. Điểm quan trọng là làm cho ghi chú của bạn trở thành một công cụ chủ động cho việc học, không chỉ là một kho lưu trữ thụ động.
#Biến Ghi Chú Coursera Của Bạn Thành Cơ Sở Kiến Thức Lâu Dài
Đây là điều về việc ghi chú trên Coursera—mục tiêu thực sự không chỉ là vượt qua bài quiz cuối cùng. Đó là xây dựng một thư viện vĩnh viễn, có thể tìm kiếm được của kiến thức riêng của bạn mà ngày càng có giá trị hơn theo thời gian. Bạn không chỉ thu thập sự kiện; bạn đang xây dựng một bộ não thứ hai.
Nền tảng cho tài sản dài hạn này phụ thuộc vào định dạng. Các định dạng độc quyền là một cái bẫy. Chúng khóa kiến thức khó kiếm được của bạn bên trong một app cụ thể, và nếu app đó biến mất, ghi chú của bạn bị giữ làm con tin.
Đây là lý do tại sao văn bản thuần túy, cụ thể là Markdown (.md), rất mạnh mẽ. File Markdown là bất tử. Bất kỳ trình soạn thảo văn bản nào trên bất kỳ máy tính nào đều có thể mở chúng, hôm nay hoặc 20 năm sau. Bạn sở hữu chúng, hoàn toàn.
Ý tưởng về quyền sở hữu này là triết lý cốt lõi đằng sau các công cụ local-first như Obsidian. Khi bạn kết hợp một công cụ như vậy với một phương pháp nắm bắt tôn trọng dữ liệu của bạn, bạn tạo ra một cầu nối liền mạch giữa việc học trực tuyến và cơ sở kiến thức cá nhân của bạn.
Ví dụ, HoverNotes được xây dựng cho quy trình làm việc chính xác này. Nó lưu ghi chú do AI tạo, ảnh chụp màn hình, và chú thích của bạn trực tiếp vào máy tính của bạn dưới dạng file .md sạch. Không có đồng bộ cloud để cấu hình hoặc đăng ký để duy trì chỉ để truy cập công việc của riêng bạn. Các file là của bạn. Di chuyển chúng, sao lưu chúng, grep chúng—chúng chỉ là file Markdown.
Đối với bất kỳ ai nghiêm túc về việc xây dựng một cơ sở kiến thức lâu dài trong Obsidian, quy trình làm việc trực tiếp đến vault này là thiết yếu. Nó loại bỏ ma sát của việc xuất hoặc sao chép-dán, làm cho việc học Coursera của bạn trở thành một phần bản địa của đồ thị kiến thức của bạn ngay từ đầu.
Cách tiếp cận local-first này đảm bảo rằng thời gian bạn đầu tư vào việc học sẽ mang lại lợi nhuận trong nhiều năm tới.
Một thư viện ghi chú là vô dụng nếu bạn không thể tìm thấy những gì bạn cần khi bạn cần nó. Một vài thói quen tổ chức đơn giản tạo ra sự khác biệt lớn. Bạn không cần một hệ thống phức tạp, chỉ cần một hệ thống nhất quán.
Gắn Tag Nhất Quán: Ở cuối mỗi ghi chú, thêm một vài tag liên quan. Đối với khóa học Python, bạn có thể sử dụng #python, #datascience, và #machinelearning. Điều này làm cho việc tìm tất cả các ghi chú liên quan sau này trở nên cực kỳ dễ dàng.
Ghi Chú Nguyên Tử: Giữ mỗi ghi chú tập trung vào một khái niệm duy nhất. Thay vì một file khổng lồ cho toàn bộ module, hãy chia nhỏ nó. Tạo các ghi chú nhỏ hơn, tập trung cho các chủ đề như "Gradient Descent," "Activation Functions," hoặc "Overfitting."
Maps of Content (MOC): Trong Obsidian, một MOC là một ghi chú hoạt động như mục lục cho một chủ đề lớn hơn. Bạn có thể tạo một ghi chú [[Data Science MOC]] và sau đó liên kết ra tất cả các ghi chú nguyên tử liên quan mà bạn đã tạo từ các khóa học Coursera khác nhau.
Những kỹ thuật này biến đổi một thư mục file thành một mạng lưới ý tưởng có thể điều hướng, liên kết với nhau. Nếu bạn mới với khái niệm này, hướng dẫn của chúng tôi về việc chọn phần mềm quản lý kiến thức cá nhân phù hợp là một nơi tuyệt vời để bắt đầu.
Hệ thống này có tác động đã được chứng minh. Trên toàn cầu, 96% học viên báo cáo đạt được sự tự tin khi ghi chú của họ cung cấp một con đường rõ ràng phía trước. Bạn có thể khuếch đại điều này bằng cách tích hợp ghi chú có cấu trúc của bạn với các công cụ như Coursera Coach, nơi 94% người dùng thấy trải nghiệm học tập được cải thiện. Đối với hàng triệu người đăng ký các khóa học GenAI, các prompt đơn giản trong ghi chú của họ như "Áp dụng điều này cho công việc của tôi trong X" đã biến việc học thụ động thành tăng trưởng nghề nghiệp hữu hình. Bạn có thể khám phá thêm về cách học viên đang đạt được mục tiêu của họ trên Coursera.org.
Bạn không đơn độc. Khi người học cố gắng xây dựng một hệ thống ghi chú nghiêm túc cho các khóa học Coursera của họ, một vài rào cản phổ biến xuất hiện. Hãy giải quyết chúng trực tiếp.
#Làm thế nào tôi có thể ghi chú trên Coursera mà không liên tục tạm dừng video?
Đây là vấn đề lớn. Không có gì giết chết sự tập trung của bạn nhanh hơn việc liên tục bắt đầu-dừng khi tạm dừng một bài giảng. Nó biến việc học thành một công việc vất vả.
Bí quyết là tách biệt hành động nắm bắt khỏi hành động xử lý.
Thay vì nhấn pause để gõ ra mọi chi tiết, bạn cần một cách để nắm bắt các khoảnh khắc quan trọng với một cú nhấp chuột hoặc phím tắt. Điều này cho phép bài giảng tiếp tục trong khi bạn đánh dấu những gì quan trọng.
Ảnh Chụp Màn Hình Có Timestamp: Thấy một sơ đồ, công thức, hoặc đoạn code quan trọng? Chỉ cần nắm bắt nó. Một công cụ như HoverNotes được xây dựng cho điều này—mỗi ảnh chụp màn hình bao gồm một timestamp có thể nhấp, để bạn có thể nhảy ngay trở lại chính xác khoảnh khắc đó trong video sau.
AI Cho Bản Nháp Đầu Tiên: Phiên âm thật tẻ nhạt. Để trợ lý AI xử lý việc tạo một bản tóm tắt cơ bản hoặc dàn ý trong khi bạn xem. Điều này giải phóng bạn để tập trung vào việc thêm suy nghĩ, câu hỏi, và kết nối của riêng bạn thay vì chỉ là người đánh máy.
Mục tiêu là ở trong trạng thái tập trung của việc học. Bạn có thể sắp xếp, tổ chức, và viết lại mọi thứ trong buổi xem lại sau.
#Định dạng tốt nhất để lưu ghi chú Coursera của tôi là gì?
Đối với ghi chú bạn muốn giữ và sử dụng trong nhiều năm, Markdown thuần túy (.md) là người chiến thắng không thể tranh cãi.
Tại sao? Nó chỉ là văn bản đơn giản. Nó không bị khóa vào bất kỳ app hoặc hệ sinh thái độc quyền nào. Một file Markdown bạn tạo hôm nay vẫn sẽ hoàn toàn có thể đọc được trên bất kỳ máy tính nào 10 hoặc 20 năm sau. Không đăng ký, không định dạng chết.
Đây là nguyên tắc cốt lõi cho bất kỳ ai sử dụng công cụ Personal Knowledge Management (PKM) local-first như Obsidian. Kiến thức của bạn không bị giữ làm con tin trong cloud của người khác; nó sống trong một thư mục đơn giản trên máy của riêng bạn. Bạn sở hữu nó.
Ghi chú của bạn trở thành một tài sản vĩnh viễn, có thể tìm kiếm được. Bạn có thể sao lưu chúng, di chuyển chúng giữa các máy tính, và đọc chúng offline mà không lo lắng về việc một công ty thay đổi điều khoản hoặc đóng cửa.
#Ghi chú do AI tạo thực sự có tốt cho việc học không?
Ghi chú AI là một điểm khởi đầu tuyệt vời, nhưng là một điểm kết thúc tệ hại. Chúng xuất sắc trong công việc nặng nhọc—tạo một dàn ý có cấu trúc, rút ra các thuật ngữ chính, và tóm tắt bài giảng. Điều này tiết kiệm một lượng thời gian đáng kinh ngạc.
Nhưng việc học thực sự đòi hỏi bạn phải kích hoạt não của mình. Bạn phải vật lộn với các ý tưởng một mình.
Quy trình làm việc hiệu quả nhất là kết hợp:
Để AI tạo ghi chú nền tảng.
Trong khi video phát, thêm bình luận của bạn—hiểu biết, câu hỏi, và kết nối.
Chụp ảnh màn hình của hình ảnh quan trọng mà bản tóm tắt AI thường bỏ lỡ.
Trong buổi xem lại sau bài giảng, diễn đạt lại bản tóm tắt của AI bằng lời của riêng bạn.
Cách tiếp cận này cho bạn hiệu quả của tự động hóa kết hợp với quá trình xử lý tinh thần sâu dẫn đến khả năng ghi nhớ thực sự.
Nếu bạn sử dụng Obsidian để học, HoverNotes lưu ghi chú trực tiếp vào vault của bạn dưới dạng file Markdown sạch, có tổ chức. Bạn có thể dùng thử miễn phí—bạn nhận được 20 phút tín dụng AI để bắt đầu, không cần thẻ tín dụng.
Bạn đang gặp khó khăn với việc ghi chú MOOC trên Coursera hay edX? Hãy tìm hiểu một quy trình đã được chứng minh để sắp xếp, lưu giữ và áp dụng kiến thức từ các khóa học dài mà không bị kiệt sức.
Khám phá plugin video obsidian tốt nhất cho quy trình làm việc của bạn. Chúng tôi so sánh các tùy chọn hàng đầu để ghi chú có dấu thời gian từ YouTube, Udemy và các video cục bộ.
Đừng quên những gì bạn học trên Coursera. Khám phá một quy trình làm việc thực tế để tạo các ghi chú Coursera hữu ích, có thể tìm kiếm giúp tăng cường khả năng ghi nhớ lâu dài.